Building Your First Junit 5 Test
This lesson provides step by step hands-on approach to run JUnit 5 test case on Eclipse IDE.
Project Setup
Please install the following softwares on your machine.Java 8
JUnit 5 tests will run with Java 8 or above. Please download and install the latest update of Java 8 or above from the official Oracle web site. www.oracle.com/technetwork/java/javase/downloads/index.html .After installing Java, you can check your Java version by running the following command -

Eclipse Oxygen or above
You can download the latest version from Eclipse web site - https://www.eclipse.org/downloads/packages/release/neon/3/eclipse-ide-java-ee-developers .Steps to write your first Junit 5 test case in Eclipse
Step 1 - Launch Eclipse IDE.
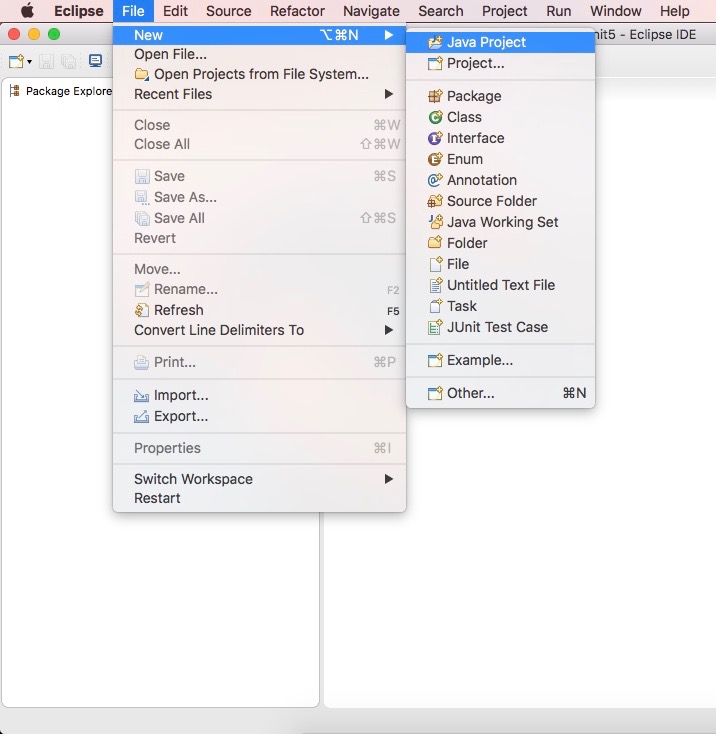
Step 2 - Create a new Java Project. Right click on File --> New --> Java Project as demonstrated in the figure below.
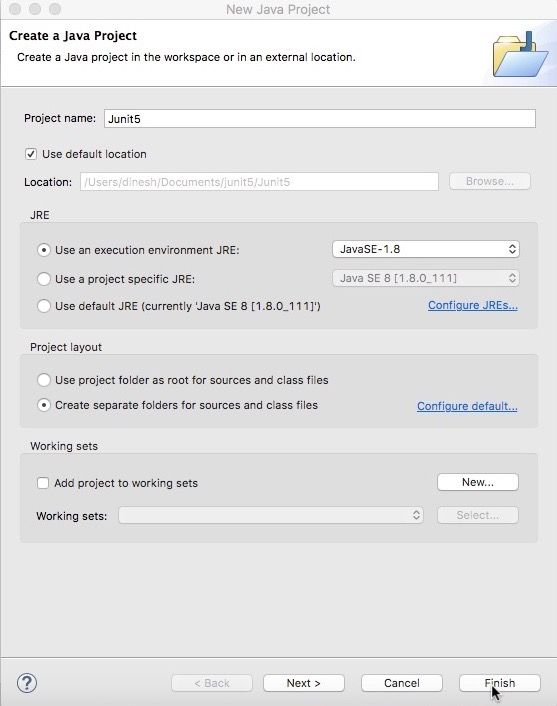
A new popup window by name “New Java Project” will be opened as shown in the figure below.
Step 3 - Provide a Project name: say, Junit5
Step 4 - Select JRE as 1.8 and above.
Step 5 - Click Finish.
A new Java Project will be created by name - Junit5
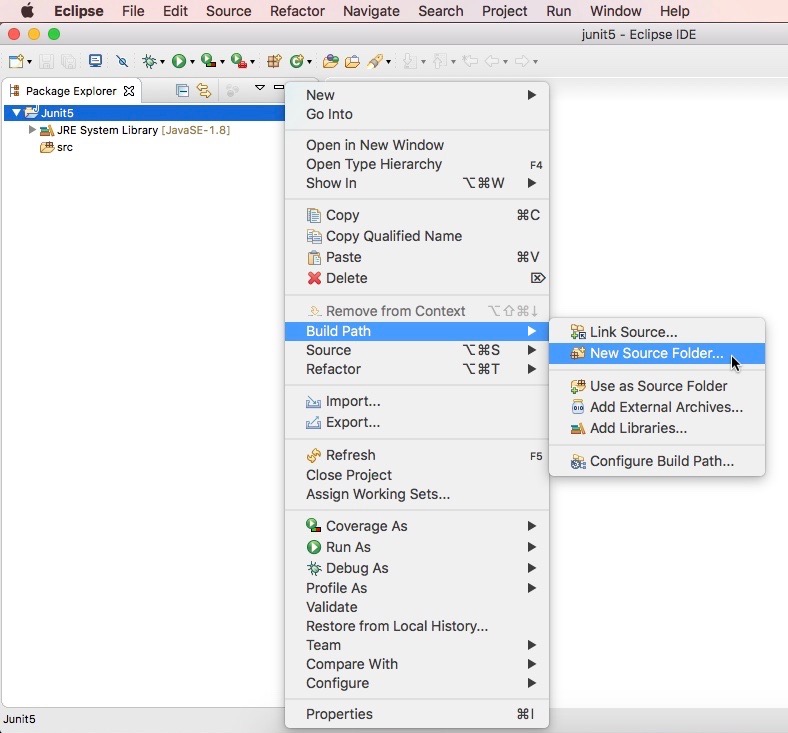
It’s a best practice to create JUnit test cases in the test folder.
Step 6 - Expand the Junit5 Java project. Right-click on project root. Traverse to Build Path --> New Source Folder... as shown in the figure below.
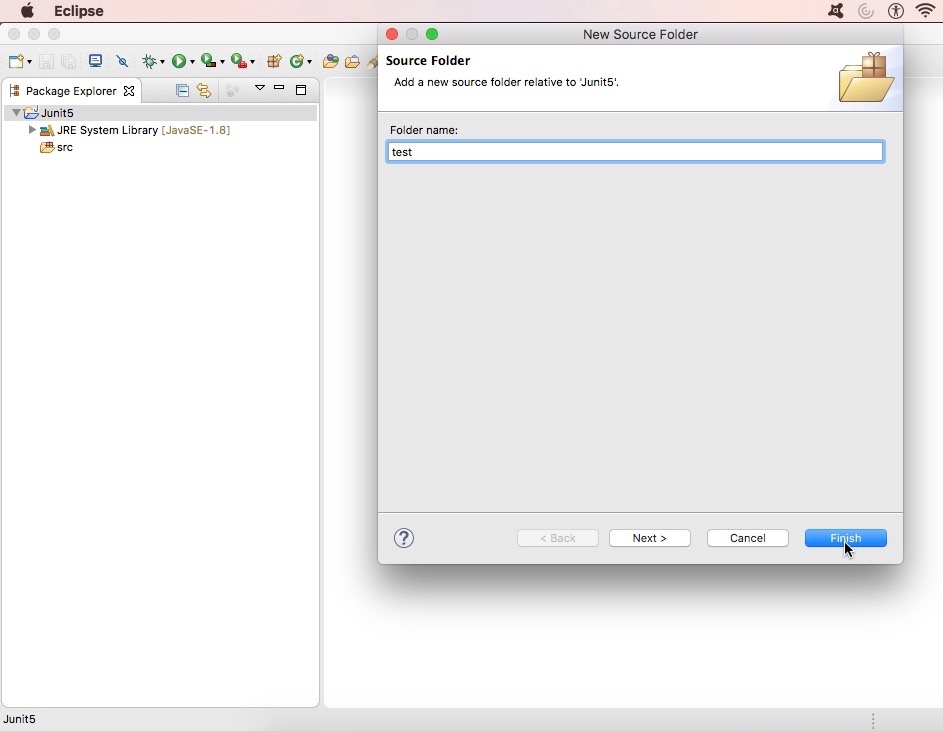
Step 7 - A "New Source Folder" popup will be opened as shown in the figure below.
Step 8 - Provide folder name as "test" and click Finish.
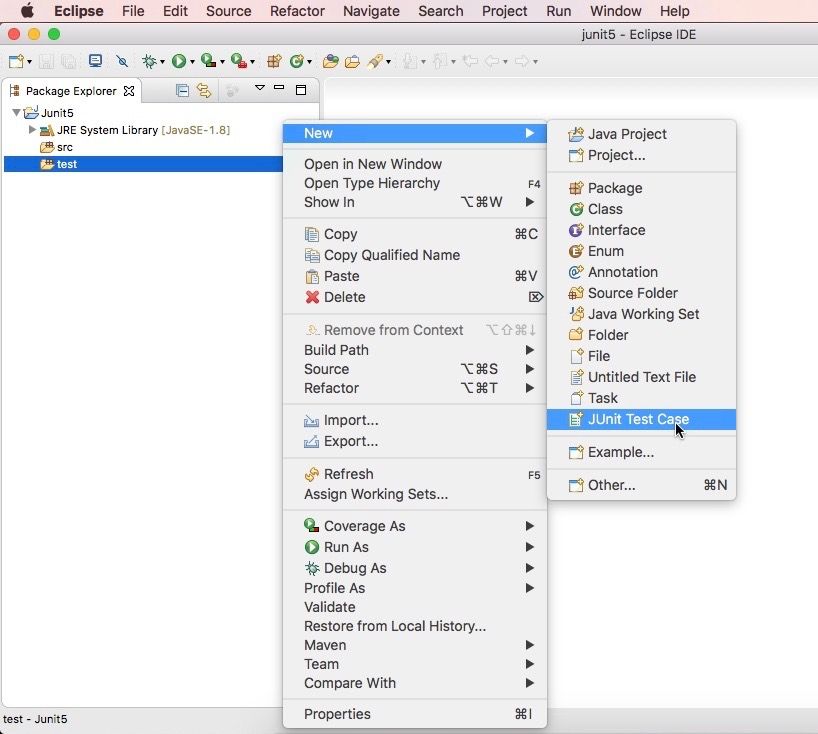
Step 9 - Right-click on test folder and traverse to New --> Junit Test Case as demonstrated in the figure below.
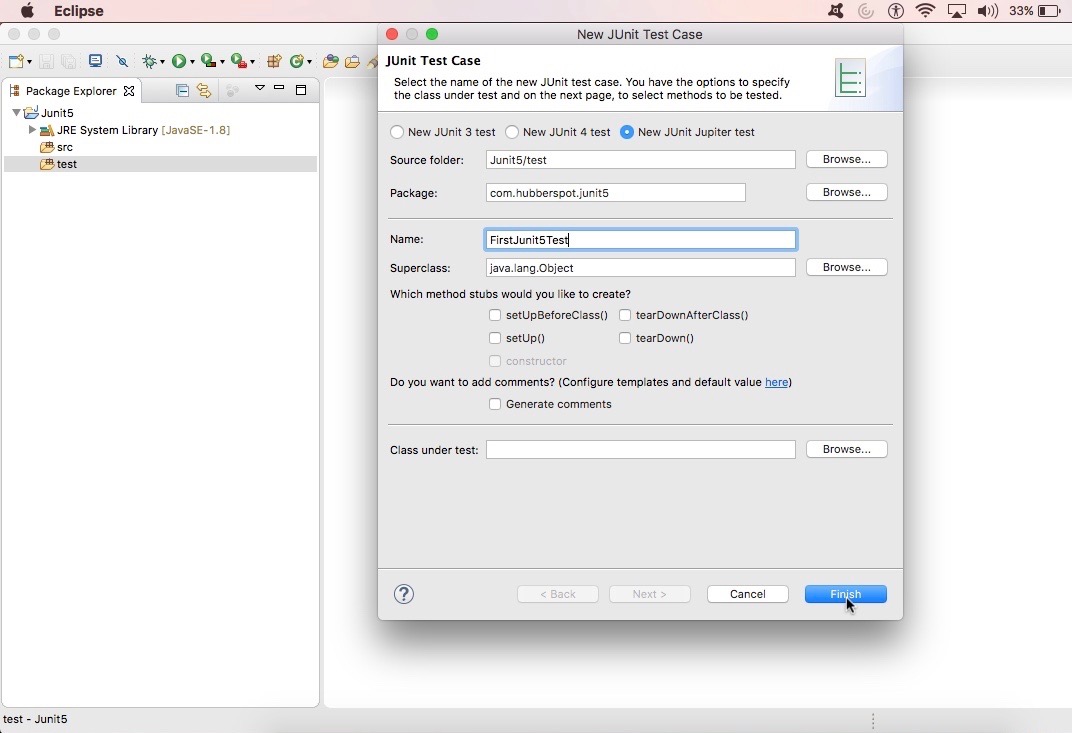
Step 10 - A "New Junit Test Case" popup will be opened as shown in the figure below.
In order to create a new JUnit 5 test case, perform the following steps:-
Step 11 - Select "New Junit Jupiter test". This will create Junit 5 test case.
Step 12 - Provide any package name of your choice.
Step 13 - Provide class name as, FirstJunit5Test.
Step 14 - Click Finish.
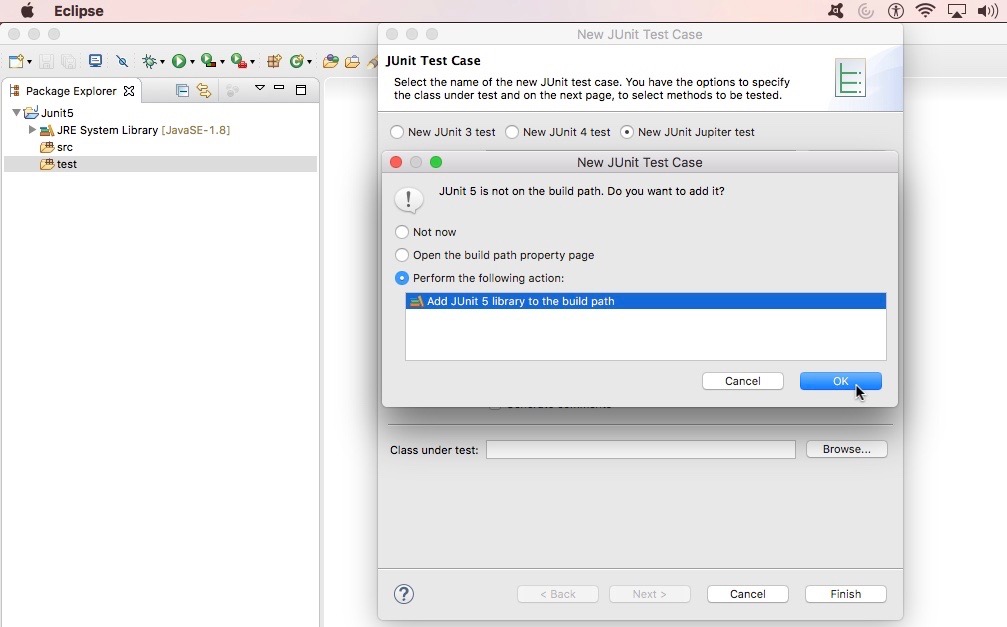
Step 15 - Add JUnit 5 library to the build path. Click Ok as shown in the figure below.
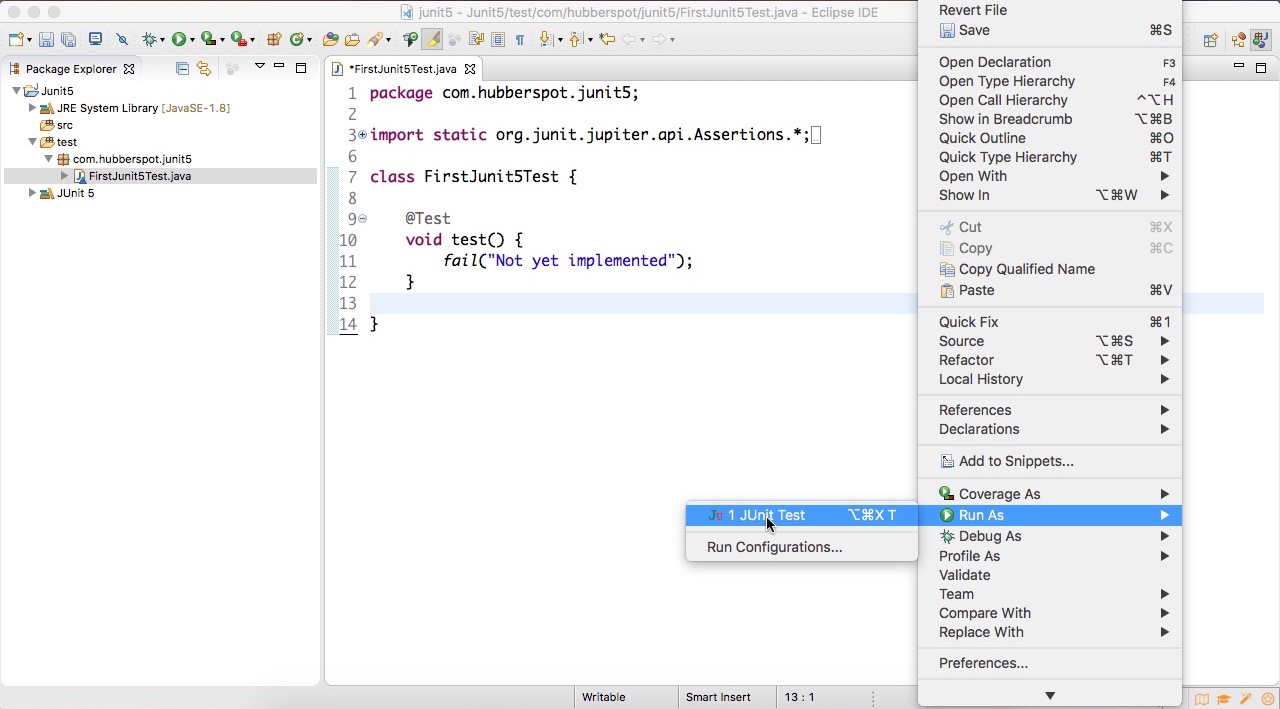
A new test class by name “FirstJunit5Test” will be created. It will have following snippet of code as shown below.
package io.educative.junit5;import static org.junit.jupiter.api.Assertions.*;import org.junit.jupiter.api.Test;class FirstJunit5Test {@Testvoid test() {fail("Not yet implemented");}}
It has a method “test()”. This method has an annotation as, @Test. It signifies that this is a test method in to which we write our code to test.
Step 16 - Right-click on editor window and run as Junit test case, as shown in the figure below.
The test case fails as shown in fig below. It gives “AssertionFailedError: Not yet implemented”. It is because in test() method it is written ‘fail(“Not yet implemented”)’ assertion. This assertion fails the test case as it is not yet implemented. More on @Test and fail() in upcoming lessons.

In the next lesson, we will look into @Test annotation in JUnit 5.