Building a Music App Layout with Flexbox
We'll cover the following...
After walking through the boring rigorous stuffs, you deserve some fun project.
It’s time to walk through a practical example and apply your newly acquired Flexbox skills
It took me days to come up with a good project. Out of the lack of a creative option, I came up with a music app layout for cats. I call it catty music. Maybe by 2036, we’d have cats singing in rock bands somewhere in mars :-)
Here’s what the finished layout looks like, and it is completely laid out with Flexbox.
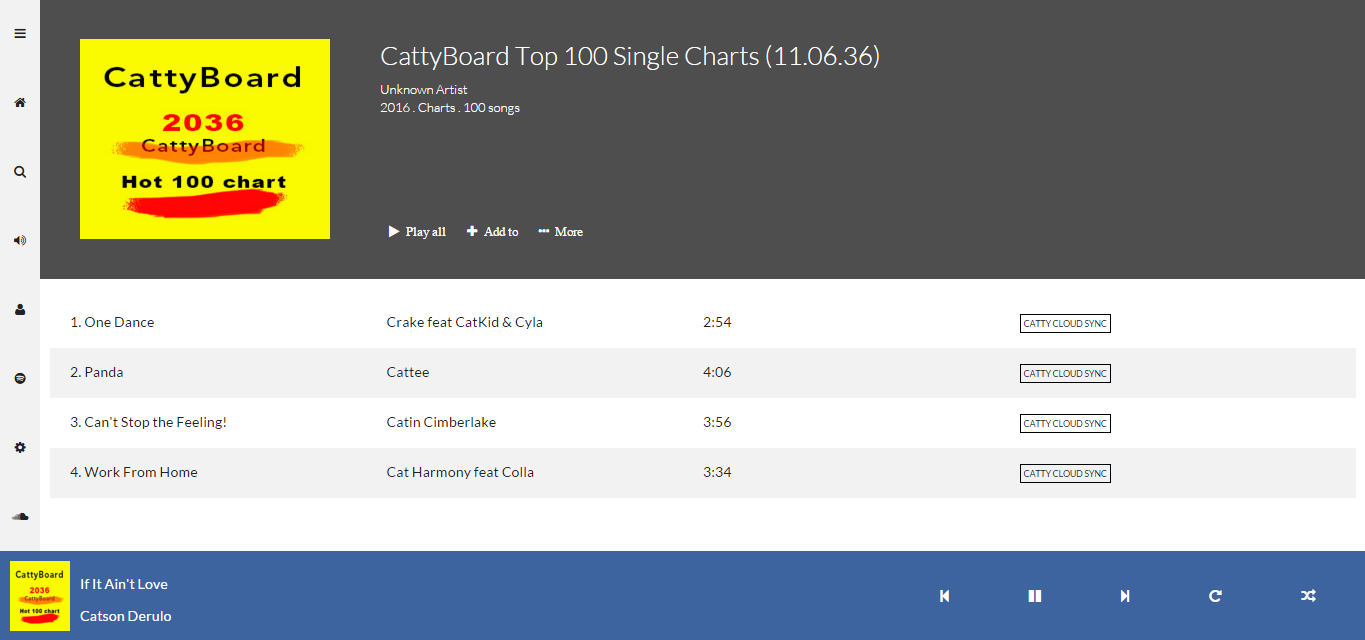
You may view it online here
If you view that on a mobile device, you’ll have a slightly different look. That’s something you’ll work on in the responsive design section of this article.
I’ve got a confession to make though.
I’ve done something considered wrong by many.
I’ve completely built the overall layout with Flexbox.
For many reasons, this may not be ideal. But it’s intentional in this scenario. I set out to show you all the things you can do with Flexbox, all wrapped up within a single project.
If you’re curious as to when it’s considered right or wrong to use the Flexbox model, you may check out my article on that. Flexbox is awesome but it’s NOT welcome here
There, I got that off my chest. Now I’m sure no one’s going to yell at me after taking this course.
Everything in Catty Music is laid out using the Flexbox model — this is intentional to show off what’s possible.
So let’s get this thing built!
As with any reasonable project, a bit of planning goes a long way sifting through inefficiencies.
Let me take you through a planned approach to building the catty music layout.
So where do you start?
Whenever building a layout with flexbox, you should start by looking out for what sections of your layout may stand out as flex-containers. You may then leverage the powerful alignment properties flexbox makes available.
The Breakdown
Take a look at the finished layout again.
You may have the overall containing body as a flex container (represented by the red border in the image below) and have the other sections of the layout split into flex-items (item 1 and 2). ...