Setting up the Environment
Get introduced to the installations required for running Appium.
Install Java
Appium has clients in multiple programming languages. Since we are going to use Java as our primary programming language, we will need Java JDK. The recommended version of Java is 8. Please also install AdoptOpenJDK or Oracle JDK.
Install Android SDK for Android automation
Android SDK is required for running tests on android phones. Android SDK can be installed on Windows, Mac, and Linux machines.
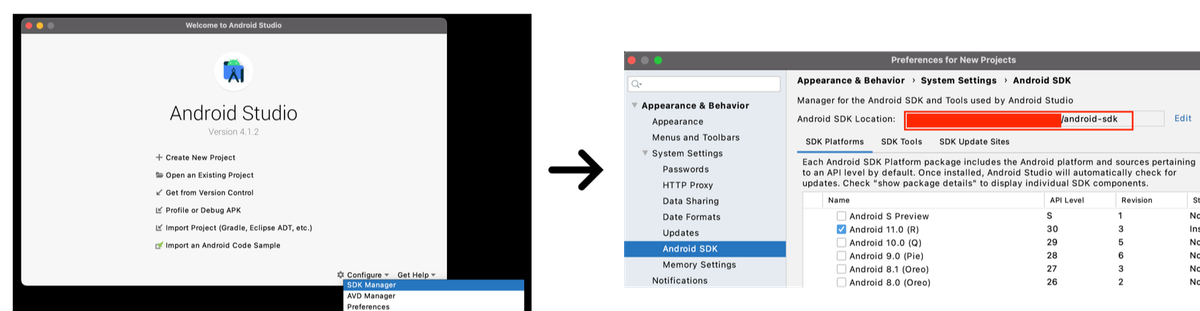
The easiest way to install android SDK and all its necessary components is by installing Android Studio. Please follow the link for installing Android Studio.
Once Android Studio is installed successfully, copy the location of the Android SDK installation as shown in the image below.
Setting the environment variables
Follow the below steps to add JAVA_HOME & ANDROID_HOME environment variables.
For windows,
- Right-click on “My Computer” (or “This PC”) → Properties → Advanced system settings
- Click on “Environment Variables”
- Click on “New” under “User variables for user” or “System variables”
- Input the key as JAVA_HOME and the value as the directory of Java installation.
- Input the key as ANDROID_HOME and the value as the location of the Android SDK installation that we identified above.
For Linux, add the following line in ~/.bashrc
export JAVA_HOME=<java-8-installation-directory>
export ANDROID_HOME=<android-sdk-installation-directory>
In linux, JAVA_HOME path could be something like this – /usr/lib/jvm/java-8-openjdk-amd64
For Mac, add the above line in ~/.bash_profile
In mac, JAVA_HOME location could be similar to –
/Library/Java/JavaVirtualMachines/jdk1.8.0_211.jdk/Contents/Home & ANDROID_HOME location could be similar to /Users/
Create emulators
Open Android Studio → Open AVD Manager → Click on “Create Virtual Device” → Choose the device skin and hardware → Download or choose the required android version
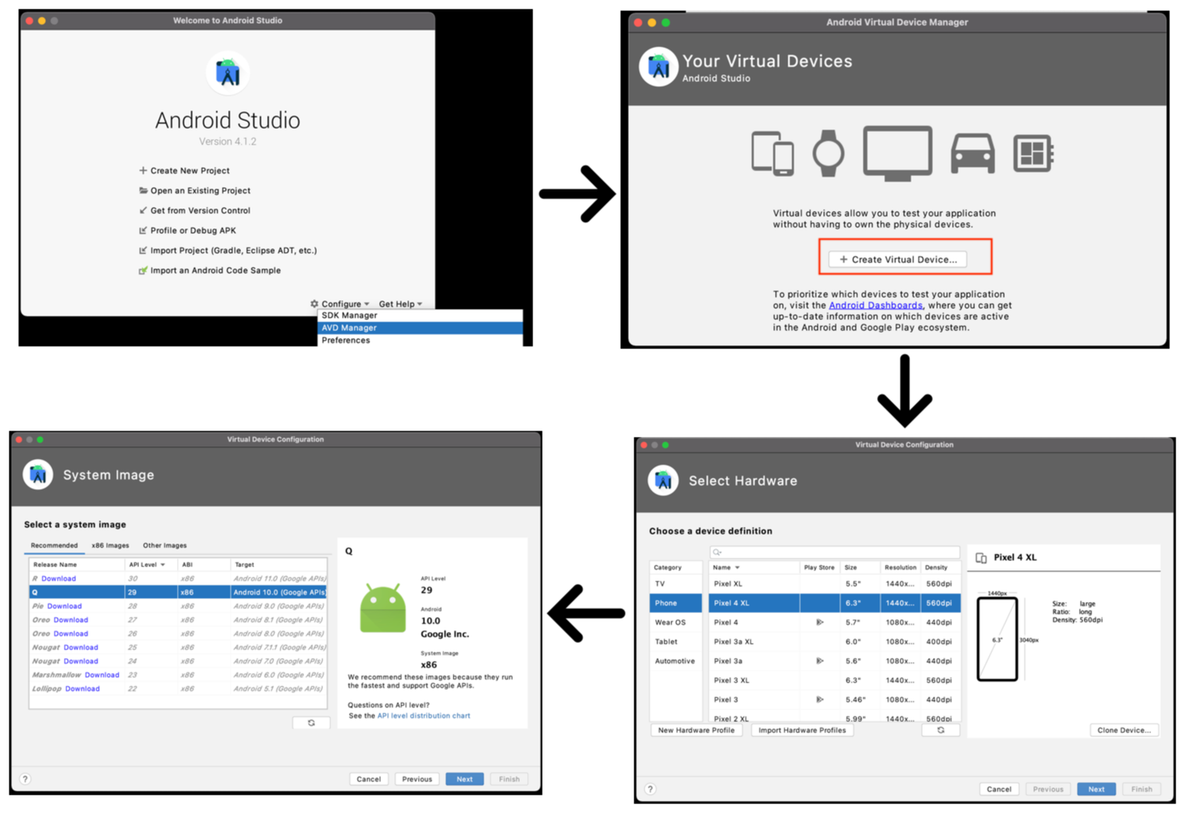
Note: We can have multiple android virtual devices or emulators of the same or different versions.
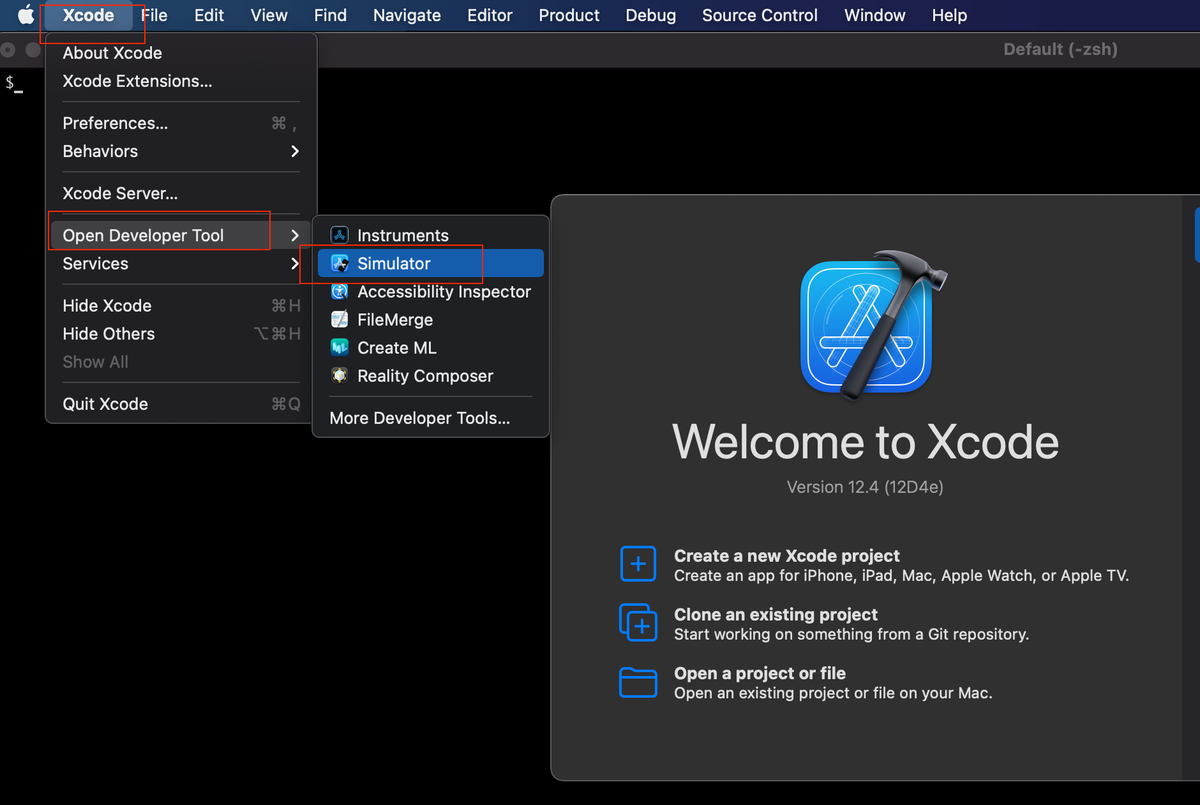
Xcode installation for iOS automation
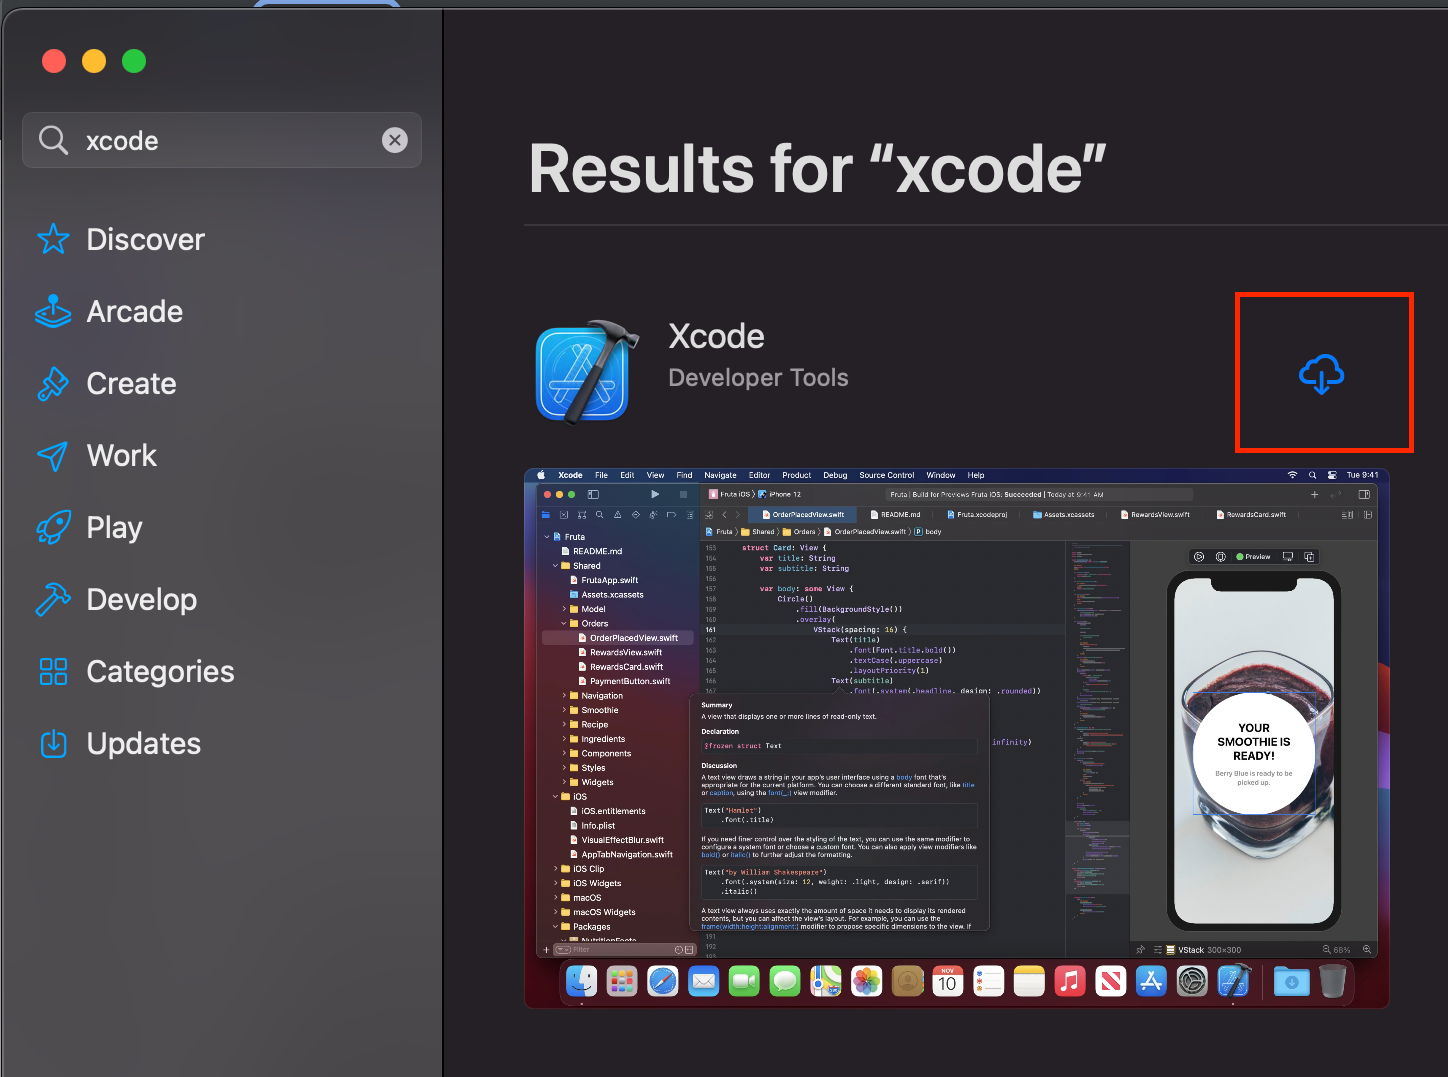
Xcode can be installed only on Mac. If you do not have a Mac machine, you can skip this installation.
Xcode can be installed from the App Store as shown below or downloaded from the stable release of Xcode from here.
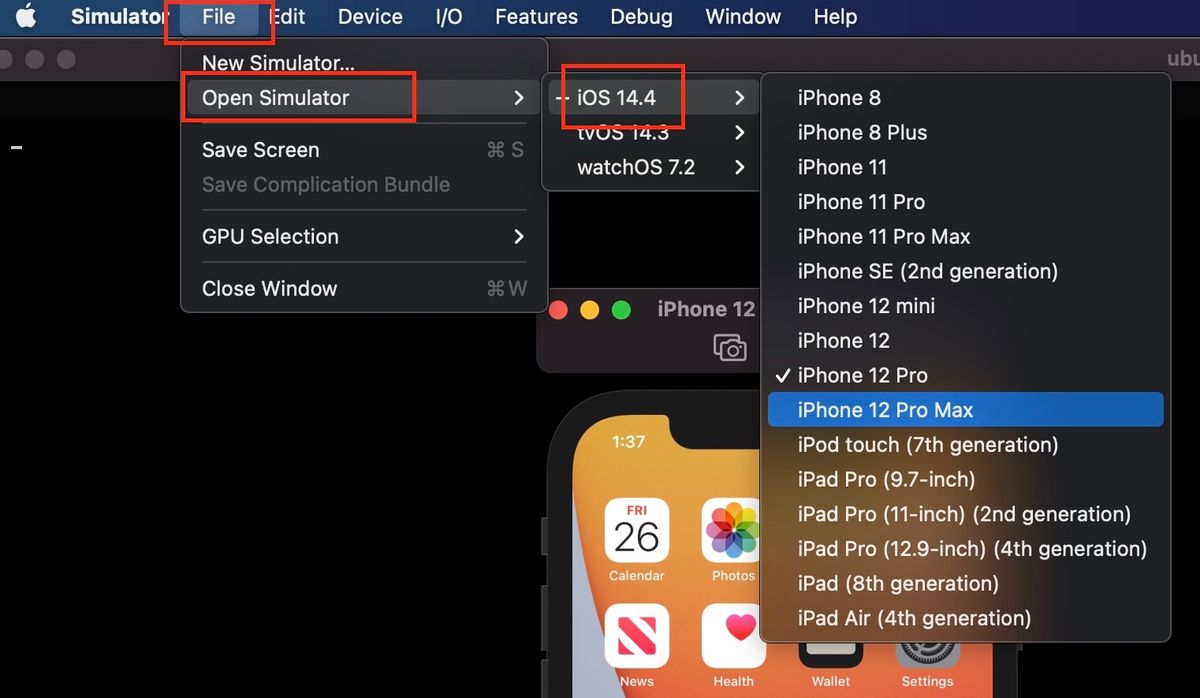
We can create an iOS simulator by following the below steps:
We can also launch it from the terminal using the following command:
open -a Simulator
Note: We can open multiple simulators at the same time.
NodeJS installation
NodeJS can be installed using any of the following ways:
- For direct installation, follow the link to install NodeJS.
- For installation using package managers, follow one of these links – windows, mac or linux
Appium installation
Once NodeJS is installed successfully, open the terminal and run the following command to install Appium:
npm -g install appium
Once Appium is installed, we can run the following commands to validate the installation and all of the prerequisites:
npm install -g appium-doctor
appium-doctor
Once all the necessary installations are done, run the following command to start Appium:
appium
When running the above command, we should see something like this denoting the successful start of the Appium server –
[Appium] Welcome to Appium v1.20.2
[Appium] Appium REST http interface listener started on 0.0.0.0:4723
Note: For running Appium tests on real iOS devices, please follow the steps given in this link.
Appium server arguments
The following table shows the various arguments or flags that we can use to override the default configurations that appium takes:
appium --port 4723 --address 0.0.0.0
| Argument | Description | Usage |
|---|---|---|
-a, --address |
IP Address to listen on. Default – 0.0.0.0 |
--address 0.0.0.0 |
-p, --port |
port to listen on. Default – 4723 |
--port 4723 |
-bp, --bootstrap-port |
port to use on android device to talk to Appium. Default – 4724 |
--bootstrap-port 4724 |
--session-override |
enable session override or cloberring | --session-override true |
-g, --log |
log output to this file | --log /path/to/appium.log |
--log-level |
for setting server and log file’s log level given in format console-level:logfile-level |
--log-level error:debug |
--chromedriver-port |
port where Chromedriver should run for android. Default – 9515 |
--chromedriver-port 9515 |
--chromedriver-executable |
absolute path of the Chromedriver executable, which should be compatible with the Chrome browser installed on the android phone | --chromedriver-executable /path/chromedriver |
--webkit-debug-proxy-port |
port used for communication with ios-webkit-debug-proxy. Default – 27753 |
--webkit-debug-proxy-port 27753 |
--relaxed-security |
for disabling additional security checks that allow us to use some advanced features provided by drivers. Default – false |
--relaxed-security true |
For more information, follow this link. Please ignore the deprecated ones.
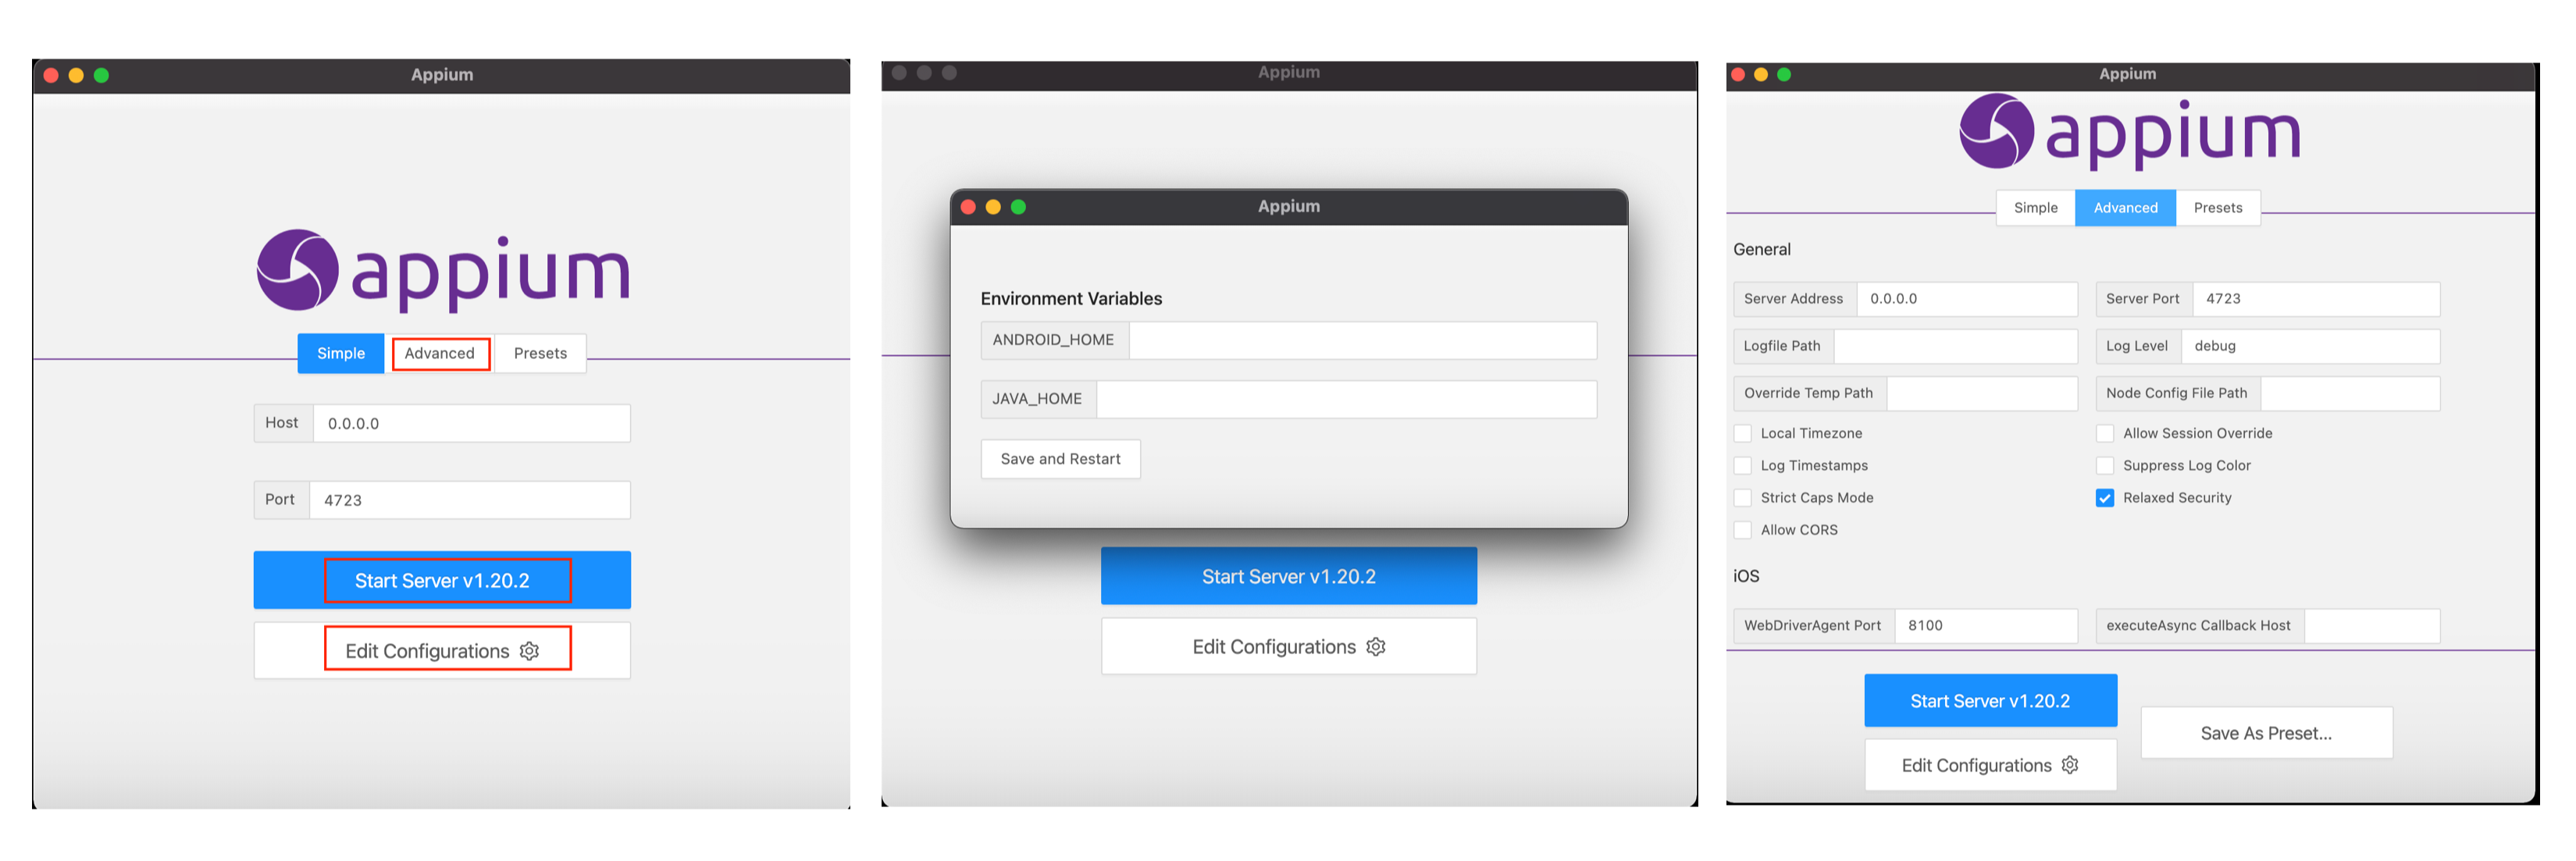
Appium desktop
Appium Desktop is a self-contained UI application for running Appium. It can be downloaded from here.
The below images show the basic and advanced configurations of the Appium server that we can use in this application:
The below images show:
(1) the Appium server console when clicking on "Start Server"
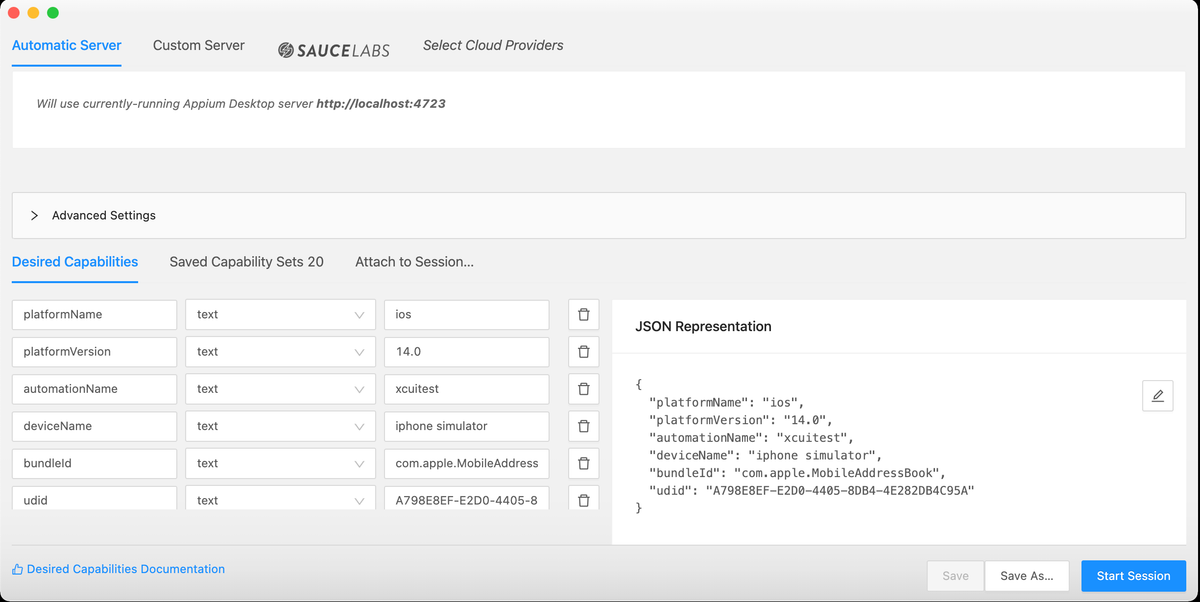
(2) the page where we can attach an inspector to the running appium session. by clicking on the highlighted part as shown in the first image. Inspector is used to find the locators of an element on an android or ios app.

Now we can attach and launch an inspector session and add the capabilities as shown below. For demonstration, we are launching the “Address Book” app on an iPhone simulator.
Once the Appium session is successfully attached and the webdriver instance is created, we should be able to see the phone’s current state and its layout hierarchy should also be shown as below:
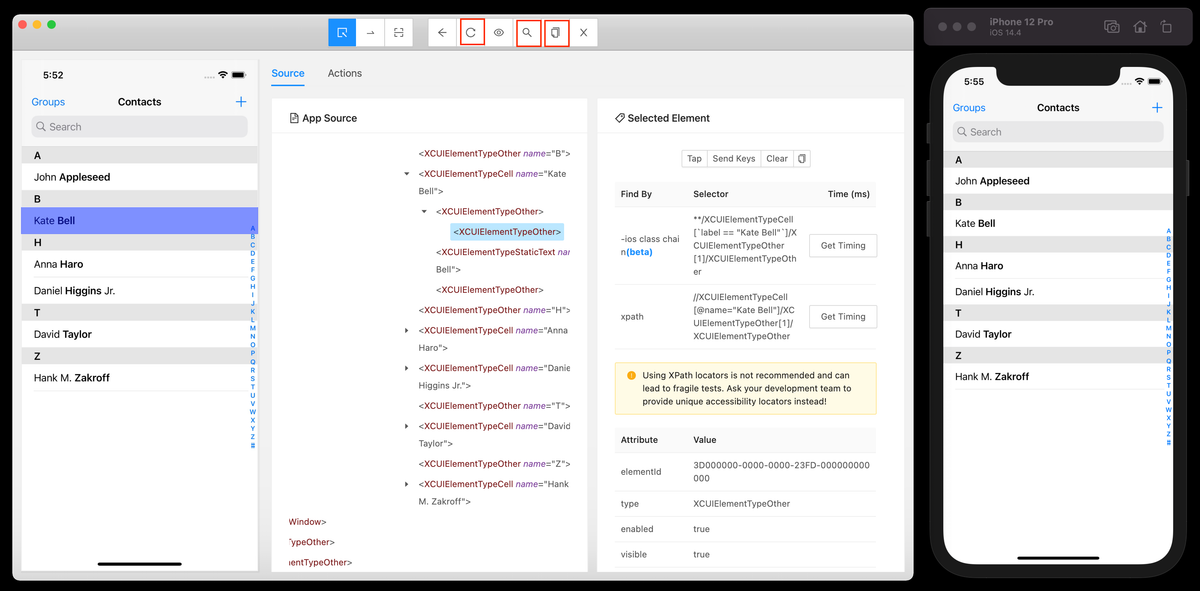
In the above image, as we hover on the elements, the corresponding element will get revealed and its locators will be populated. Now we can perform the following operations:
- Send keys
- Click on the element
- Navigate back and forth on the app
- Capture screenshot
- Reload the app’s state at any point in time by clicking on the “Reload” button
- Validate the locator using the “Search” button
- Copy the current page source using the “Copy” button
- Get the attributes of the highlighted element
Note: For fetching the device ids, run the following commands:
- Android –
adb devices- Real iOS devices –
idevice_id -l- iOS simulators –
xcrun simctl list | grep -i booted
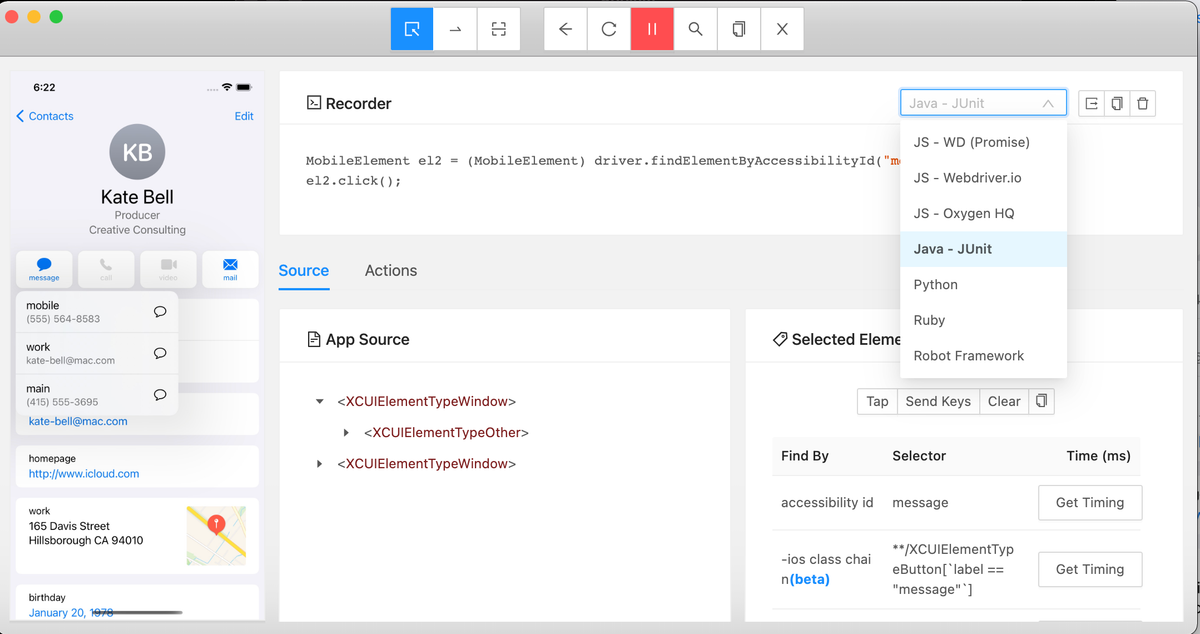
Appium Desktop also provides us with a recording option using which the code is auto-generated as shown in the below image: