How to set up Pulumi
In this article, I will be going through the steps for setting up Pulumi and creating your own infrastructure using Azure as our cloud provider. By the end of this article, you should be able to set up and authenticate Pulumi with Azure and have created an Azure resource for a Function app.
What you’ll need:
- An Azure Account
- A Text Editor (e.g.,VS Code)
- Node installed
- Tyepscript
Setting up
Install Pulumi
Download and install Pulumi. Depending on your environment, you should use any of these commands:
Windows
choco install pulumi
MacOS
brew install pulumi
Linux
curl -fsSL https://get.pulumi.com | sh
Configure Azure for Pulumi
Pulumi authenticates with Azure in two ways.
- Azure CLI login
- Service principal authentication
For the sake of this tutorial, we will use the Azure CLI login. However, if you’re ever running Pulumi in production and need to manage your infrastructure resources in your build or release pipeline, you would use the service principal authentication.
To use the Azure CLI login, open your terminal and run this command:
az login
After successfully logging in, you will need to create a storage account and blob container in your Azure subscription. You need this because this is where Pulumi stores the state of your infrastructure. We’ll do this in the next few steps.
- Step 1: Go to the Azure portal and create a storage account. Give it whatever name you like. For this tutorial, I called my storage account pulumistore.

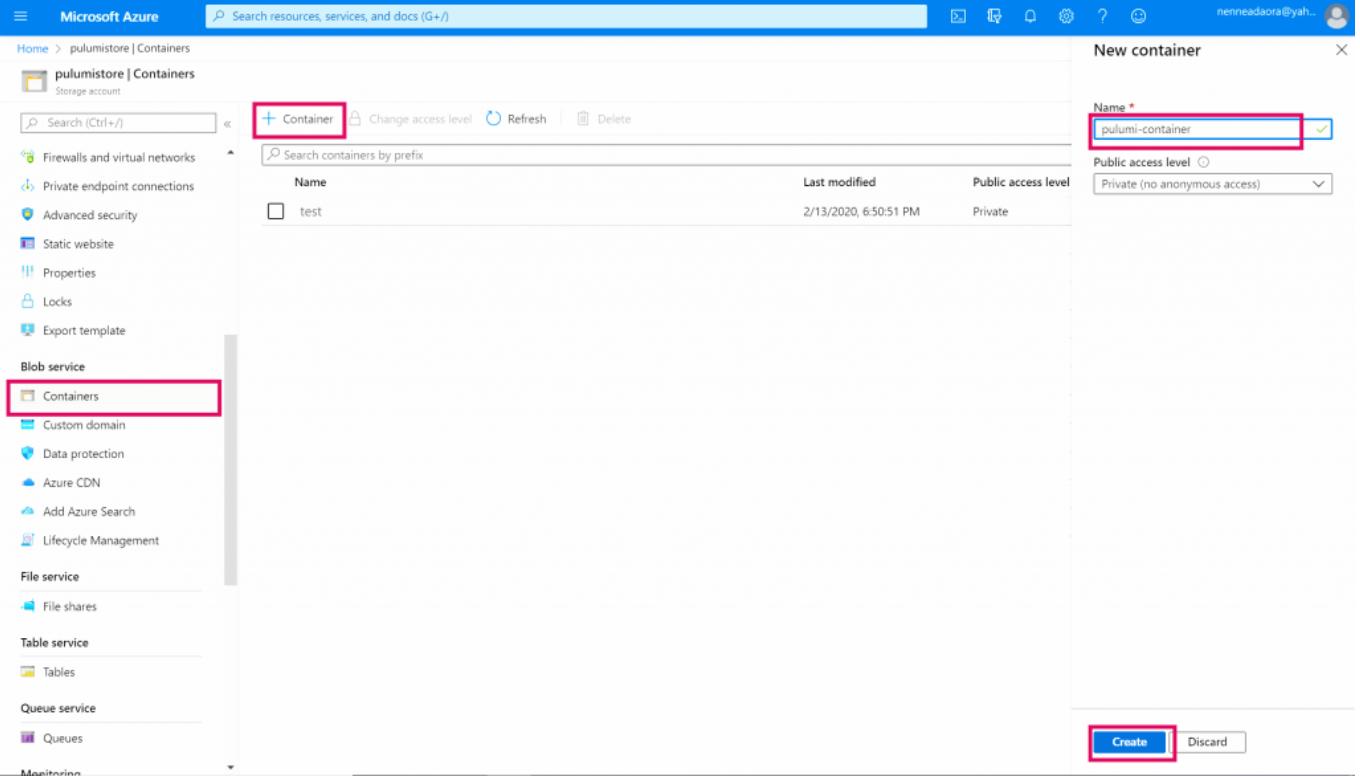
- Step 2: Once you’ve successfully created your storage account, click on the Containers tab and create a container with private access. I called mine pulumi-container.
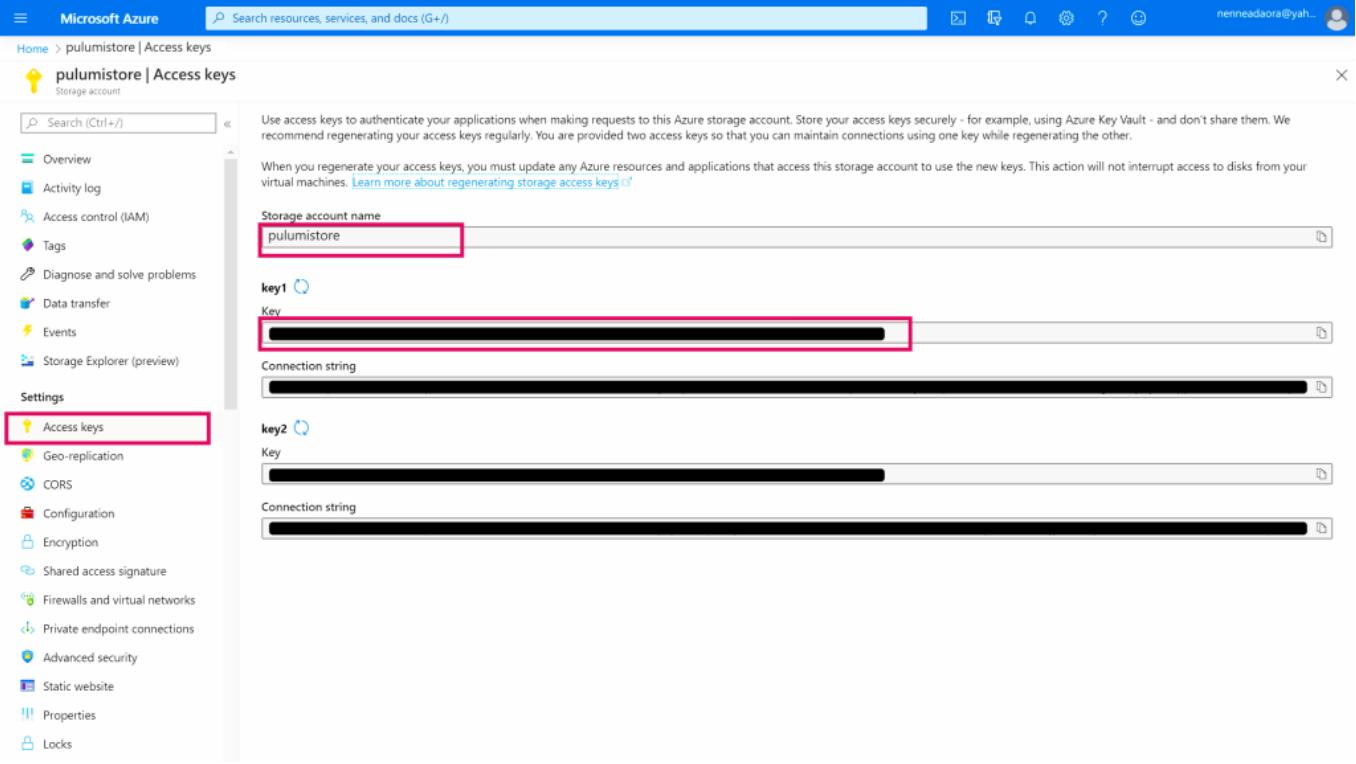
- Step 3: Once you’ve successfully created your blob container, go back to the access keys tab on your storage account because you will need three things to move on; storage account name, storage account key, and blob container name.
- Step 4: Once you have the three values you need to proceed, open your terminal window and set these environment variables. I am using the terminal in VS code, so this is what my commands would look like.
$env: AZURE_STORAGE_ACCOUNT = "storage-account-name"
$env: AZURE_STORAGE_KEY = "storage-account-primary-key"
Now, you’re all set to login to Pulumi. To do that, run this command:
pulumi login --cloud-url azblob://<blob-container-name>
We have successfully authenticated plum with Azure using our blob container as our Pulumi backend.
Next, we’ll learn how to create a new project in Pulumi.
RELATED TAGS
CONTRIBUTOR
- undefined by undefined
