How to change the font and color of a Kivy label
This shot will go over how to change the font and color of a label in Kivy. There is a lot to cover for both of these operations, but I will try to condense them and be as clear as possible. Before we start, I am going to show how to do this in the Kivy design language.
Let’s look at the minimum code needed in our .py file and what the beginning of our .kv file should look like.
Input
import kivyfrom kivy.app import Appfrom kivy.uix.widget import Widgetfrom kivy.lang import BuilderBuilder.load_file('shot.kv')class Shot(Widget):passclass ShotApp(App):def build(self):return Shot()if __name__ == '__main__':ShotApp().run()
Output
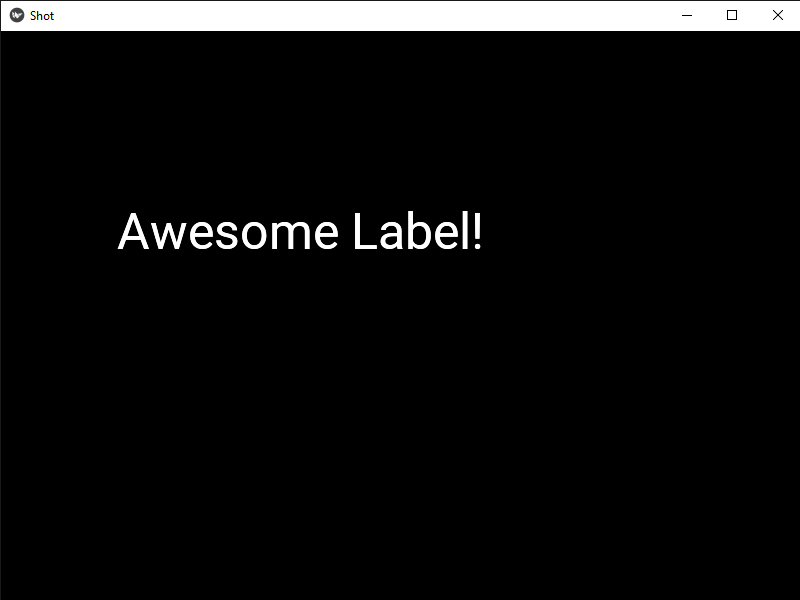
Awesome! We now no longer to touch our .py file as we will do the rest in the Kivy design language in the .kv file.
We will start by changing the font. To do this, we need to type font_name: in our code below Label in the .kv file. Once this is done, we need to add the style of font that we would like to have in our code.
Kivy pulls the computer’s
.ttffiles. If you need any help on the font file’s name, I highly recommend searching “List of .ttf files”. For now, I will show how to change the font to Comic Sans MS, which isfont_name: "Comic".
<Shot>GridLayout:cols: 1size: root.height, root.widthLabel:text: "Awesome Label!"font_size: 50font_name: "Comic"

We have now changed the font of our label, so it’s time to change the color of the label. However, this is a little tricky compared to changing the color of a button.
Underneath font_name, we are going to put background_color: (0, 0, 1, 1). This means we are trying to set the background of the label blue. However, if you were to run this code right now, with just that line added, nothing would happen. To fix this, we will make a canvas under Label. This is shown below.
Input
<Shot>GridLayout:cols: 1size: root.height, root.widthLabel:text: "Awesome Label!"font_name: "Comic"font_size: 50background_color: (0, 0, 1, 1)canvas.before:Color:rgba: self.background_colorRectangle:size: self.sizepos: self.pos
Output
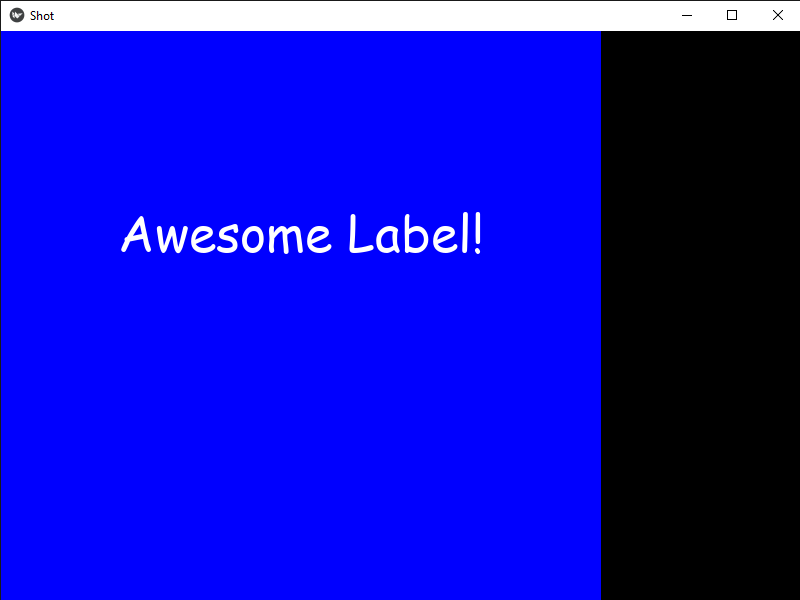
As you can see, we had to create the canvas for the label with canvas.before: and add the Color widget to declare a variable that is our background_color. The Rectangle widget under canvas.before: is for the shape and position that your canvas will fill for the label.
There is more than one way to change the label’s background, but this should give you a good starting point to play around with it to meet your needs.