How to integrate Firebase notifications in React Native (Android)
Introduction
Notifications are an integral part of a mobile application. These notifications grab the user’s attention and increase the engagement of your app. Apps like Instagram have used notifications to make users come back to their application when a follower comments on your post or if someone follows your account.
Firebase offers a service called Firebase Notifications that enables developers to send notifications from the Firebase dashboard or their server.
In this shot, we will learn how to integrate Firebase notifications in our React Native application and send notifications from our Firebase dashboard.
Installation steps
The first step is to create a new React Native(RN) Project. Go to your terminal and run the commands below:
npx react-native init firebasenotification
cd firebasenotification
After we create a new RN project, we have to create a new Firebase project and configure it in our RN project.
Go to your Firebase console and create a new project or use a pre-existing project.
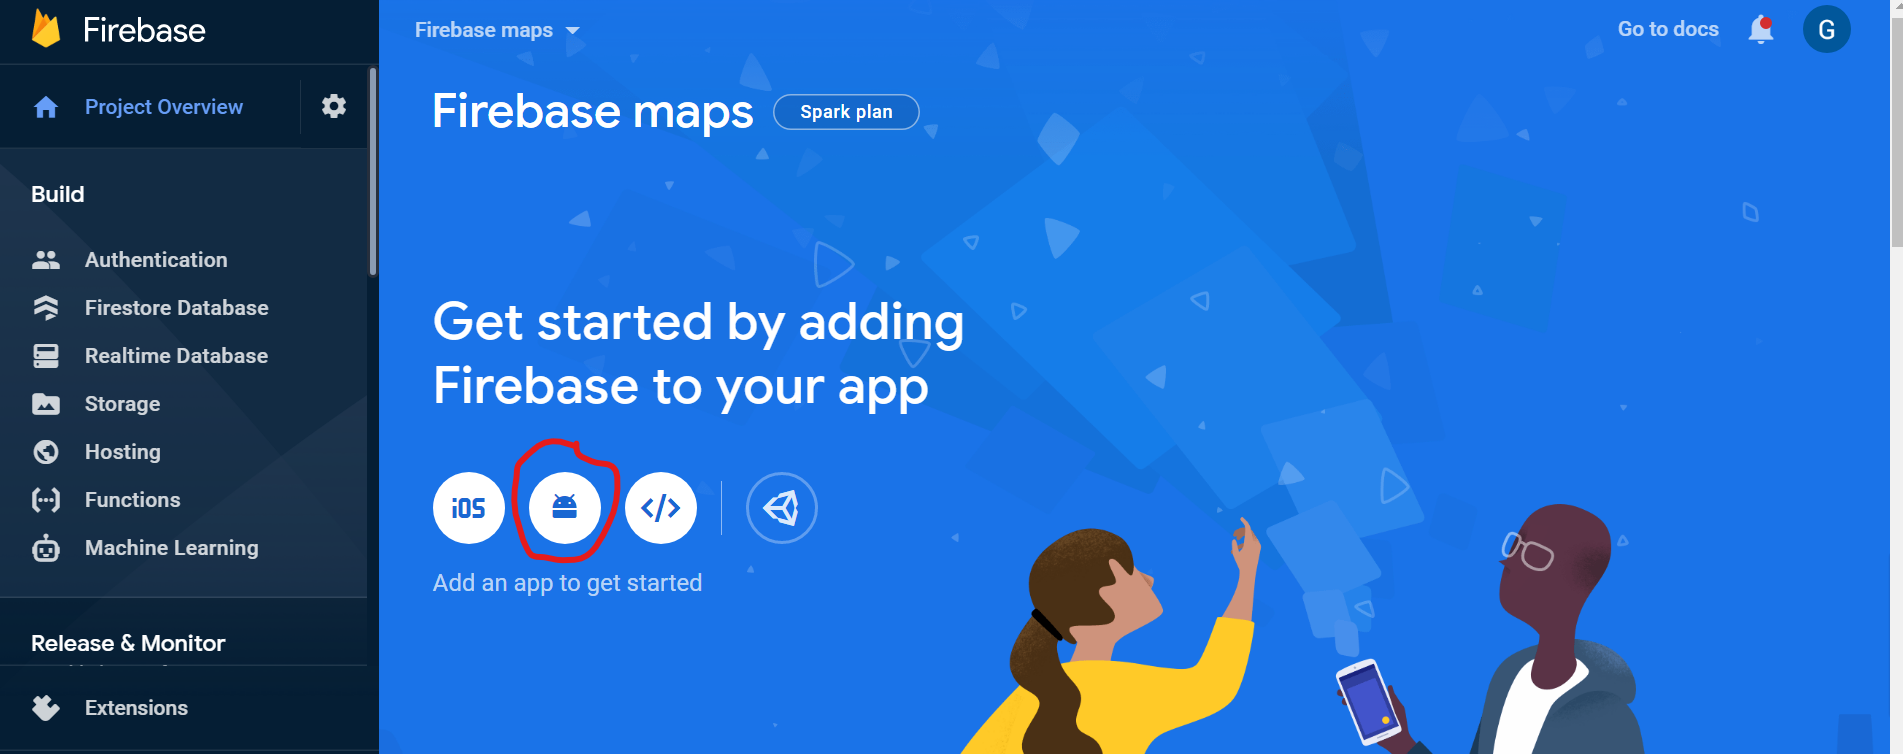
Now, go into your Firebase console and create a new Android app for your Firebase project.
Next, name your React Native project in the app name and click on Register App.
Download the “google-services.json” file and paste it into the “android --> app” folder in your React Native project.
Go to the “build.gradle” file in the “app” folder and paste in the necessary code.
// Top-level build file where you can add configuration options common to all sub-projects/modules.

buildscript {
    ext {
       buildToolsVersion = "30.0.2"
        minSdkVersion = 21
        compileSdkVersion = 30
        targetSdkVersion = 30
        ndkVersion = '20.1.5948944'
        googlePlayServicesVersion = '+'
        firebaseVersion = '+'
    }
    repositories {
        google()
        mavenCentral()
    }
    dependencies {
        classpath("com.android.tools.build:gradle:4.2.2")
        classpath 'com.google.gms:google-services:4.3.10'
        // NOTE: Do not place your application dependencies here; they belong
        // in the individual module build.gradle files
    }
}

allprojects {
    repositories {
        mavenCentral()
        mavenLocal()
        maven {
            // All of React Native (JS, Obj-C sources, Android binaries) is installed from npm
            url("$rootDir/../node_modules/react-native/android")
        }
        maven {
            // Android JSC is installed from npm
            url("$rootDir/../node_modules/jsc-android/dist")
        }

        google()
        maven { url 'https://www.jitpack.io' }
    }
}
Next, go to the “build.gradle file” in the “android --> app” folder and add the following line to the top of the page:
apply plugin: 'com.google.gms.google-services'
Now, add the following line of code in the dependencies part of “build.gradle.”
implementation platform('com.google.firebase:firebase-bom:26.4.0')
After successfully configuring Firebase in the “build.gradle” files, install the necessary npm packages related to Firebase in our RN project.
npm i @react-native-firebase/app
npm i @react-native-firebase/messaging
After you install the packages related to Firebase, install the react-native-push notification package.
npm i react-native-push-notification
Configure your React Native application
After you install the necessary packages, go to the android folder --> app --> src --> main and open the “AndroidManifest.xml” file.
Inside the file, replace the code to contain the code below:
<manifest xmlns:android="http://schemas.android.com/apk/res/android"
  package="com.firebasenotification" xmlns:tools="http://schemas.android.com/tools">

  <uses-permission android:name="android.permission.INTERNET" />

   <application
      android:name=".MainApplication"
      android:label="@string/app_name"
      android:icon="@mipmap/ic_launcher"
      android:roundIcon="@mipmap/ic_launcher_round"
      android:allowBackup="false"
      android:theme="@style/AppTheme"
      android:hardwareAccelerated="true"
      android:largeHeap="true"
      >
      <meta-data tools:replace="android:resource"      android:name="com.google.firebase.messaging.default_notification_color" android:resource="@android:color/white" />
    <meta-data android:name="com.google.firebase.messaging.default_notification_icon" android:resource="@drawable/ic_notification" />
      <activity
        android:name=".MainActivity"
        android:label="@string/app_name"
        android:configChanges="keyboard|keyboardHidden|orientation|screenSize|uiMode"
        android:launchMode="singleTask"
        android:windowSoftInputMode="adjustResize"
        android:exported="true">
      </activity>
       <meta-data  android:name="com.dieam.reactnativepushnotification.notification_channel_name"  android:value="Firebase Notifications"/>
       <meta-data  android:name="com.dieam.reactnativepushnotification.notification_channel_description" android:value="Firebase Notifications"/>
       <meta-data  android:name="com.dieam.reactnativepushnotification.notification_color"   android:resource="@android:color/white"/>
      <receiver android:name="com.dieam.reactnativepushnotification.modules.RNPushNotificationPublisher" />
      <receiver android:name="com.dieam.reactnativepushnotification.modules.RNPushNotificationBootEventReceiver">
       <intent-filter>
          <action android:name="android.intent.action.BOOT_COMPLETED" />
      </intent-filter>
      </receiver>
       <service android:name="com.dieam.reactnativepushnotification.modules.RNPushNotificationListenerService"
      android:exported="false" >
      <intent-filter>
    <action android:name="com.google.firebase.MESSAGING_EVENT" />
      </intent-filter>
      </service>
    </application>
</manifest>
After you replace “AndroidManifest.xml” with the code above, perform the following steps:
- Grab the FCM token to send a notification to the user’s mobile.
- Add a notification icon to the React Native application so we can see our app’s logo in the notification message whenever we send a notification.
- Lastly, set up notification handlers to open our app when it is in the background and exited state.
Grab the FCM token
Now we are going to grab the FCM token of the user’s mobile.
FCM Token
The Firebase Cloud Messaging (FCM) Token is a unique token or identification number for a mobile device that developers can use to send notifications to that specific device.
To grab the FCM token of the user’s device with React Native, we can use Firebase’s getToken() function, which is available in the @react-native-firebase/messaging package.
In App.js, create an asynchronous function to get the FCM token of the user’s mobile.
import messaging from "@react-native-firebase/messaging";

const getFCMToken = async () => {
  try {
    const token = await messaging().getToken();
    console.log(token);
  } catch (e) {
    console.log(error);
  }
};
To get the FCM Token in the console, we will use this function in an useEffect hook that has an empty dependency array. We do this to get the FCM token when the screen loads for the first time. The entire code of App.js is shown below:
import React, { useEffect } from "react";
import { SafeAreaView, Text } from "react-native";

import messaging from "@react-native-firebase/messaging";

const App = () => {
  const getFCMToken = async () => {
    try {
      const token = await messaging().getToken();
      console.log(token);
    } catch (e) {
      console.log(error);
    }
  };

  useEffect(() => {
    getFCMToken();
  }, []);
  return (
    <SafeAreaView>
      <Text>Firebase Notification tutorial</Text>
    </SafeAreaView>
  );
};

export default App;
Notification icon maker
Each app has its own logo. By default, notifications will be sent without our app’s logo.
So, if we want to add our logo to the notifications, we have to go to the link below and make notification icons to use inside of our React Native project.
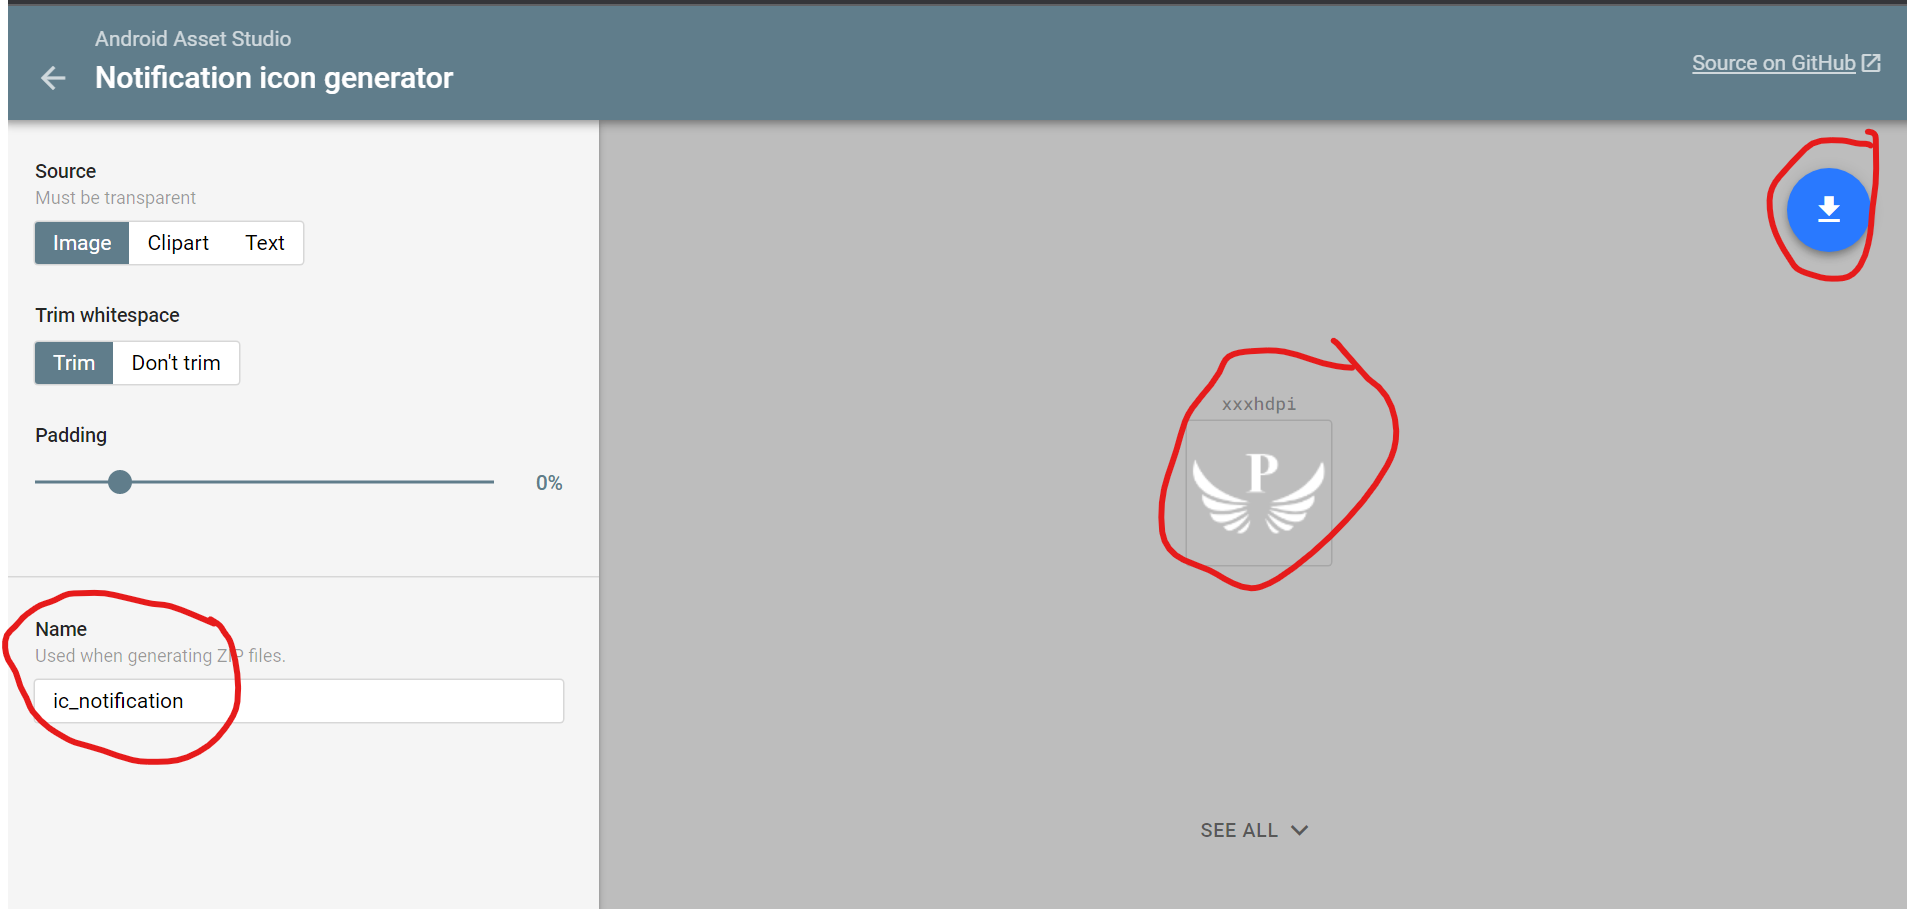
On this website, we can create our notification icons. Drag and drop your logo onto the website and change the name at the bottom left to “ic_notification” and click the download button. You will get a zip file.
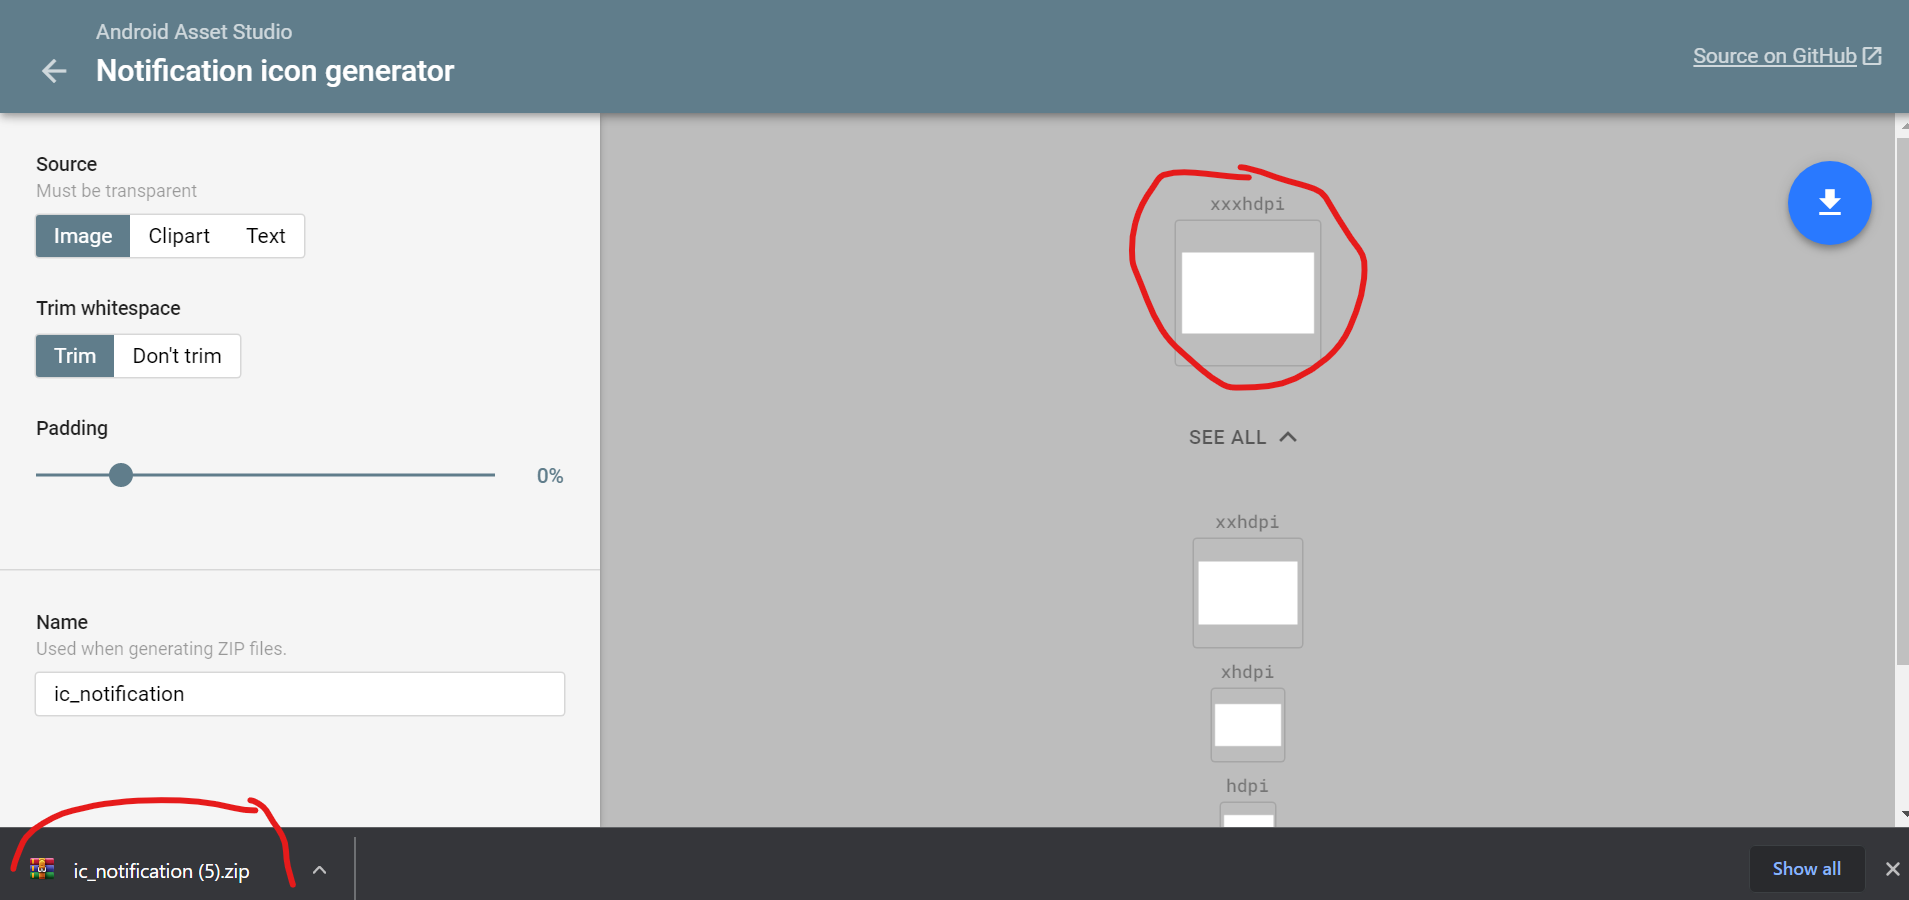
The most important thing about creating a notification icon is that your logo background should not have any color. If you have a background color like black or white, your notification icon will look like this:
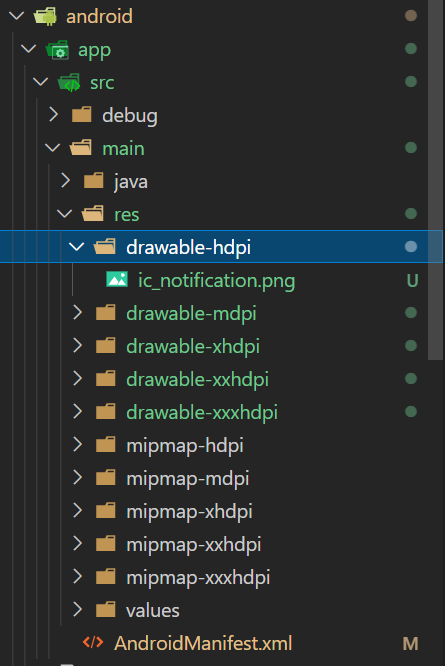
Now, unzip the zip file and paste the folder contents in the android folder --> app–> src --> res folder. You will see a folder structure like this:
How to handle notification events
The next step is to handle notification events. There are two scenarios when handling notifications:
- The app is in the background state.
- The app is in the exit state.
We cannot get notifications when the app is running or is in the foreground state.
To handle both of these notification states, we will add some Firebase messaging code to our App.js.
In App.js, add the code below in the useEffect hook:
messaging().onMessage(async (remoteMessage) => {
  console.log("A new FCM message arrived!", JSON.stringify(remoteMessage));
});

messaging().onNotificationOpenedApp((remoteMessage) => {
  console.log("onNotificationOpenedApp: ", JSON.stringify(remoteMessage));
});

messaging()
  .getInitialNotification()
  .then((remoteMessage) => {
    if (remoteMessage) {
      console.log(
        "Notification caused app to open from quit state:",
        JSON.stringify(remoteMessage)
      );
    }
  });
messaging().setBackgroundMessageHandler(async (remoteMessage) => {
  console.log("Message handled in the background!", remoteMessage);
});
In the code above, we handle events such as:
- What should happen when the user clicks on the notification?
- What should happen when the app is in the exit state?
Our App.js code will look like this:
import React, {useEffect} from 'react';
import {SafeAreaView, Text} from 'react-native';

import messaging from '@react-native-firebase/messaging';

const App = () => {
  const getFCMToken = async () => {
    try {
      const token = await messaging().getToken();
      console.log(token);
    } catch (e) {
      console.log(error);
    }
  };

  useEffect(() => {
    getFCMToken();

    messaging().onMessage(async remoteMessage => {
      console.log('A new FCM message arrived!', JSON.stringify(remoteMessage));
    });

    messaging().onNotificationOpenedApp(remoteMessage => {
      console.log('onNotificationOpenedApp: ', JSON.stringify(remoteMessage));
    });

    messaging()
      .getInitialNotification()
      .then(remoteMessage => {
        if (remoteMessage) {
          console.log(
            'Notification caused app to open from quit state:',
            JSON.stringify(remoteMessage),
          );
        }
      });
    messaging().setBackgroundMessageHandler(async remoteMessage => {
      console.log('Message handled in the background!', remoteMessage);
    });
  }, []);
  return (
    <SafeAreaView>
      <Text>Firebase Notification tutorial</Text>
    </SafeAreaView>
  );
};

export default App;
Now, run the following command in the terminal to run the app in your emulator:
npm run android
Once the app is up and running, you will get the FCM token in the console. Copy that token to use it in the Firebase dashboard.
Since we now have the user mobile’s FCM token, we can send notifications from the Firebase dashboard.
How to send notifications from the Firebase dashboard
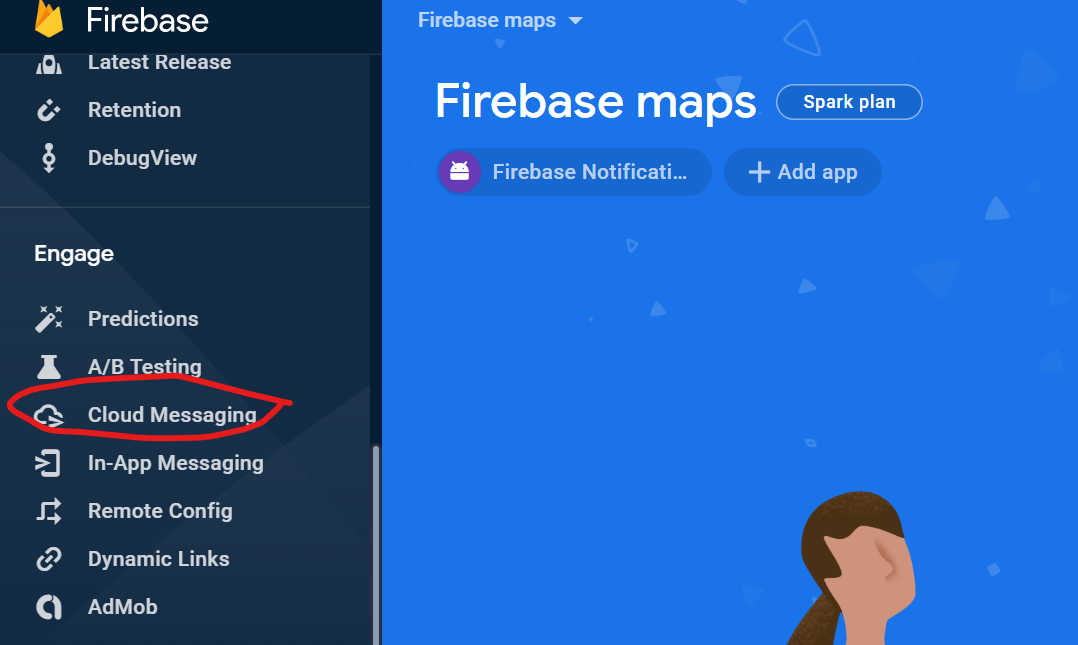
In the Firebase dashboard, go to the “Cloud Messaging” section.
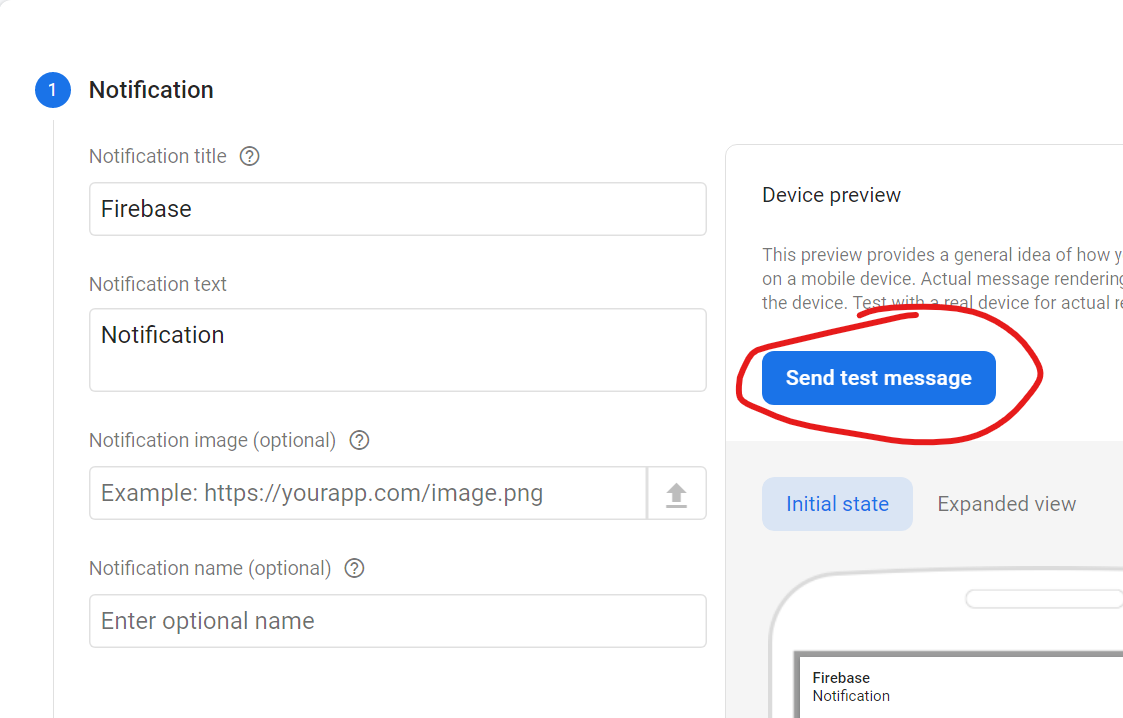
Click the “send your first message” button and then fill in the notification title and message in the Firebase dashboard.
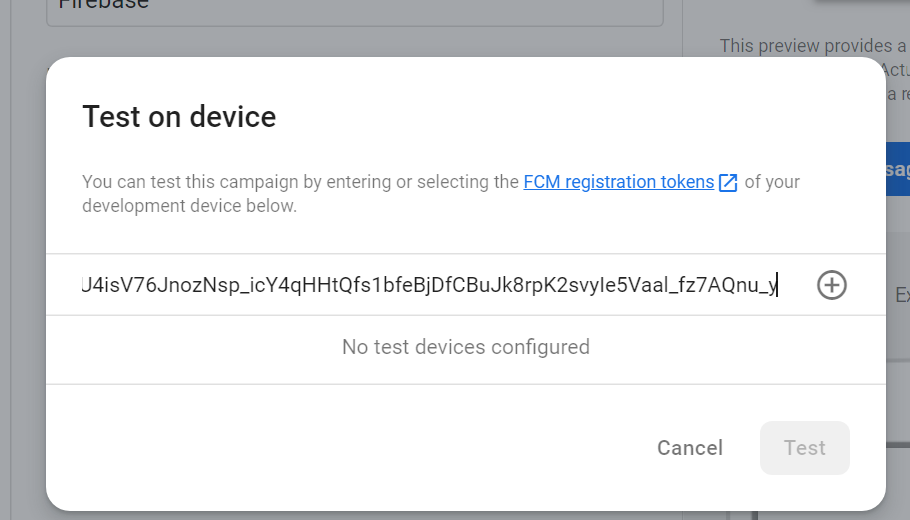
Then, click the “send test message” button. You will be asked to fill in the FCM token. You have to paste the FCM token you copied from the React Native console and paste it in there.
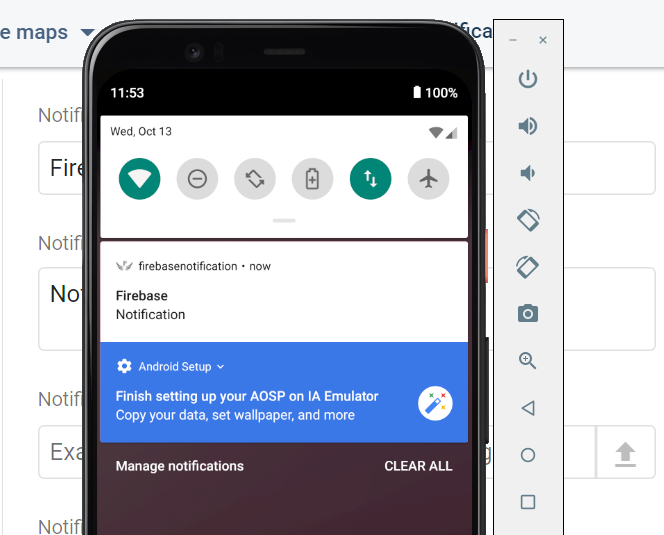
Now, click the test button and you will receive a notification in your emulator with the title, description, and logo of your app.
We have successfully integrated notifications in our React Native application.
Important factors to consider about Firebase notifications
-
You will not get notifications if your app is in the foreground, i.e., if your app is running. You will only get notifications when the app is in the background or in an exit state.
-
You can set up a server to listen to user events and send personalized notifications.
Conclusion
In this shot, we have seen how to configure our React Native application with a Firebase project, use a notification icon maker to add a logo to our notification messages, and send notifications from the Firebase console.
You can find all the code used in this shot in this GitHub link.
