How to setup React Native with Expo on Ubuntu
For any developer who is new to mobile application development using React Native, Expo is a great way to ease your transition. Let’s have a look at how Expo can be used to setup React Native on Ubuntu:

Pre-requisites
-
Node.js and npm must be installed prior to setup.
-
A smartphone to download the Expo mobile application.
Installation
Step 1 - Expo CLI
Run the following command in your Ubuntu terminal to install the command line interface (CLI) of Expo:
npm install expo-cli --global
The --global flag installs the package globally on the system, not just in your current project directory.
Step 2 - Create project
After the successful installation of Expo CLU, it’s time to use the CLI to create an expo project. Run the following command:
expo init PROJECTNAME
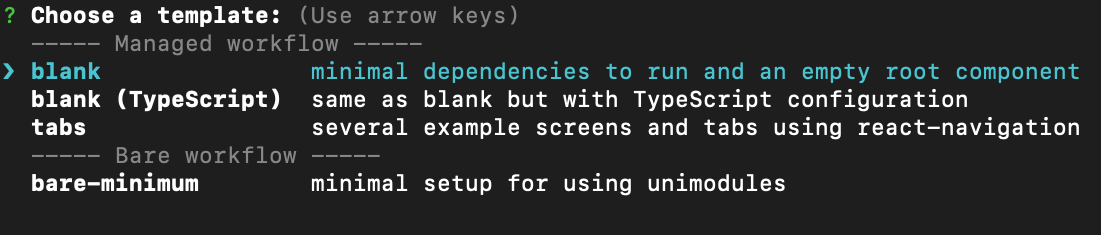
Upon running this command, the CLI will ask you to chose a type of template for your project. Choose blank (minimal dependencies).
Next, the CLI will ask you to set a name for your project:

After this, the required dependencies will be installed and your project will finish building.
Step 3 - Run project
In a terminal in your project directory, type the following command to run your project:
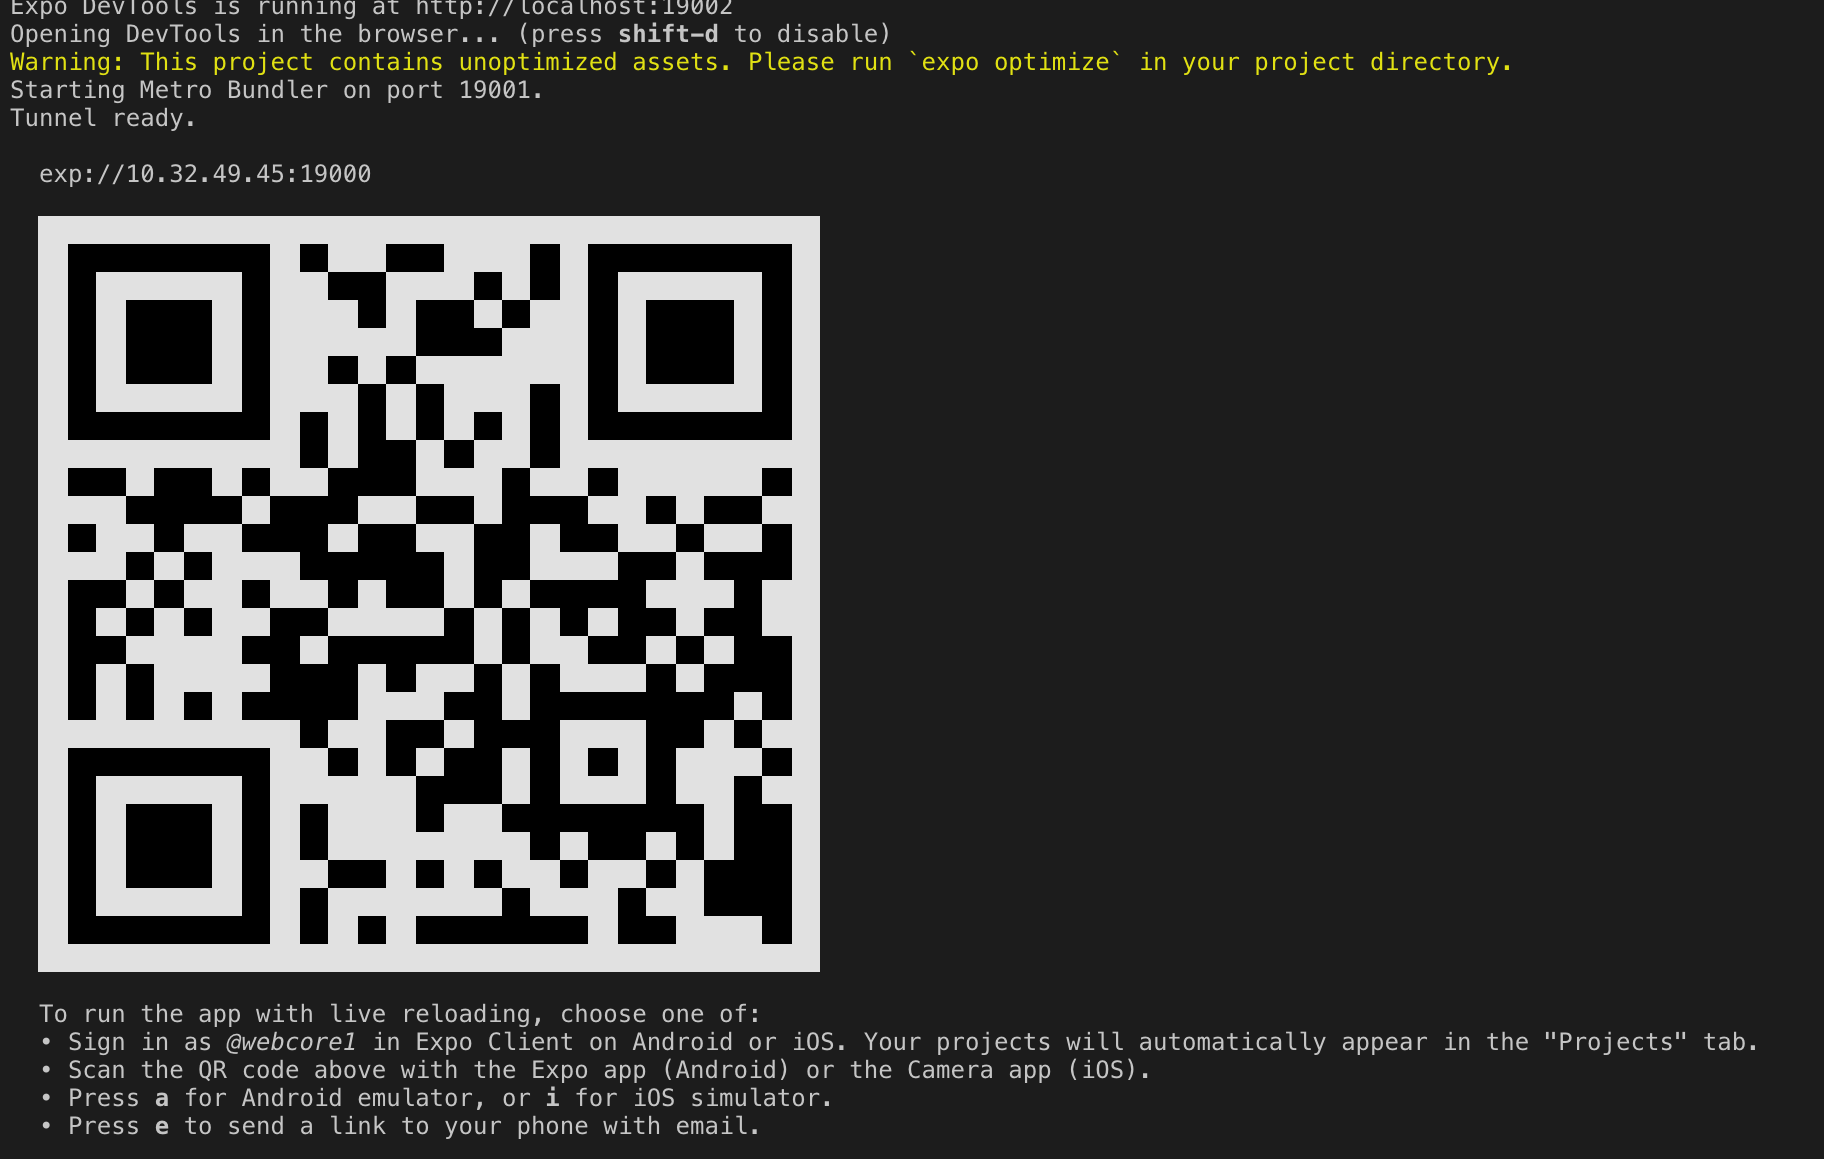
expo start
If your project runs successfully, a QR code will appear on your terminal as shown:
Step 4 - Download Expo App
Download the Expo mobile application to your Android or iOS smartphone.
On the mobile app, go to Scan QR Code and a camera screen will appear. Focus the QR code from Step 3 on the camera, and your project will load on your screen. Since it is a basic project, only a blank white screen will be shown.
Free Resources