What is identity pool in AWS Cognito?
Identity pool
AWS Cognito Identity pool does both Authentication and authorization, but in a different way.
The AWS Cognito Identity pool uses Federated identity for authenticating users. Different identity federations can be provided by:
- Social Identity Provider
- SAML Identity Provider
- OpenID Connect Provider
- Amazon Cognito User Pool
Kindly note, the AWS Identity pool is the service provider in the identity federation paradigm – it uses the identity providers to authenticate the user.
Once these identity providers do their magic (authentication), they inform the Identity pool by issuing a type of token. Upon receiving the token, the identity pool will authorize users to a different level of access.
The identity pool will provide the user with different levels of access by using IAM Roles.
Identity pool uses AWS STS, a service to grant the users credentials to access AWS resources.
Configure identity pool
Configuring Identity Pool is a two Step Process.
TO start, select Manage identity Pool from the screen once you created the user pool. You will then be met with the following screen.
Step 1: Create Identity Pool
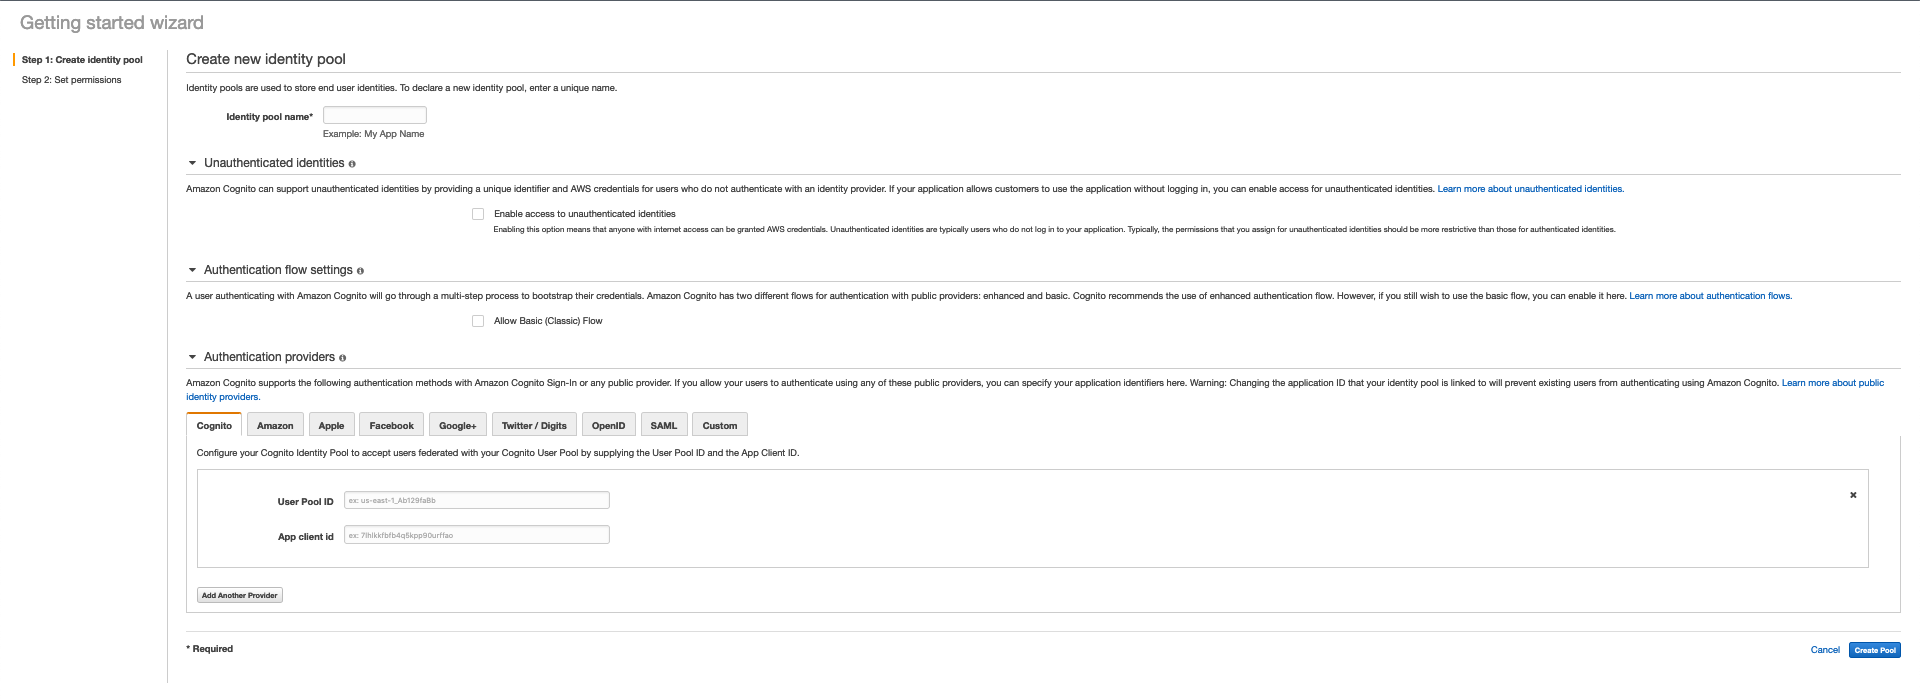
In this step, you have to configure three things as well as provide a name for the identity pool.
-
Unauthenticated Identities
- AWS Cognitio provides support for the Guest users. It generates a unique ID for each guest.
- In the future, if they said guest registers, their complete session will already be saved into the user directory.
-
Authentication flow settings
- We can select a basic or an enhanced authentication flow.
-
Authentication providers
- We have All the Social Identity providers along with OpenID and SAML.
- We will use Cognito, which needs us to provide the user pool id and App Client ID that was created during the user pool.
Now that you’ve filled in the required details, let’s proceed to the most important step in AWS Cognito, providing Permissions.
- Step 2: Set Permissions
This is the screen, as you can probably guess, that will provide two types of IAM Role to both Authenticated and Unauthenticated users. The IAM Role is created here.

Below is the IAM policy statement for Authenticated Users in the AWS Cognito Identity pool:
{
  "Version": "2012-10-17",
  "Statement": [
    {
      "Effect": "Allow",
      "Action": [
        "mobileanalytics:PutEvents",
        "cognito-sync:*",
        "cognito-identity:*"
      ],
      "Resource": [
        "*"
      ]
    }
  ]
}
Below is the IAM policy statement for UnAuthenticated Users in AWS Cognito Identity pool:
{
  "Version": "2012-10-17",
  "Statement": [
    {
      "Effect": "Allow",
      "Action": [
        "mobileanalytics:PutEvents",
        "cognito-sync:*"
      ],
      "Resource": [
        "*"
      ]
    }
  ]
}
Once you are ready, just select *Allow, and your AWS Cognito Identity Pool will be created. Then, you can integrate it with the SK you want to use.
Learn more!
Free Resources