Billionaire's Club: Conventional Spring Way
Learn to build a simple web application using the conventional Spring Framework.
Introduction
The world’s first billionaire, John D. Rockefeller, made his fortune in the petroleum industry. As of today, there are more than 2,400 billionaires all over the world, per Forbes.
Becoming a billionaire is a distant dream for most people.
You must be thinking about what billionaires have to do with a Spring Boot course. It is because we will build a sample billionaires’ club application.
In our course, we will build two applications.
- Billionaire’s Club - Billionaire’s Club is a closed community. It has stringent criteria for membership.
- Elite Club - Elite Club is an aggregator application that is open to everyone. It allows users to search for all the available clubs, browse through them, and perform CRUD operations.
To begin with, let’s build the Billionaire’s Club application.
Billionaire’s Club using Spring Framework
Billionaire’s Club is a simple application that allows us to store billionaires’ names, and perform CRUD operations using REST endpoints.
For this course, we use the H2 in-memory database to store the information. This means the information will be lost if the application crashes or restarts. We can replace H2 with a database that has persistence capability (such as MySQL, or Postgres) if you follow along and develop code on your system.
Let’s design an application traditionally with the Spring Framework. It’s going to be a simple three-layer CRUD application.
The Spring Framework version we will use is 4.3.0-RELEASE.
What we’ll need
Before we start, we’ll need the following software installed on our computer:
- Java 8
- Tomcat Web Server
- Apache Maven 3.3+
- IDE of our choice (Eclipse or Intellij Idea)
- Google Chrome
- Postman
- Docker (Optional)
Note: If you don’t want to set up new software on your machine, you can use the set up and running application provided below.
Developing application
The very first step is to identify and add all required Maven dependencies in pom.xml.
Notice the lines of code and the configuration required to develop such a simple CRUD application.
Although the whole code will be available to us in the Github repository, some important files are listed below.
<?xml version="1.0" encoding="UTF-8"?><project xmlns="http://maven.apache.org/POM/4.0.0"xmlns:xsi="http://www.w3.org/2001/XMLSchema-instance"xsi:schemaLocation="http://maven.apache.org/POM/4.0.0 http://maven.apache.org/xsd/maven-4.0.0.xsd"><modelVersion>4.0.0</modelVersion><groupId>com.spring.rest</groupId><artifactId>SpringRestApp</artifactId><version>0.0.1-SNAPSHOT</version><packaging>war</packaging><name>SpringRestApp Maven Webapp</name><properties><project.build.sourceEncoding>UTF-8</project.build.sourceEncoding><maven.compiler.source>1.8</maven.compiler.source><maven.compiler.target>1.8</maven.compiler.target><springframework.version>4.3.0.RELEASE</springframework.version><jackson.library>2.8.7</jackson.library></properties><dependencies><dependency><groupId>junit</groupId><artifactId>junit</artifactId><version>4.11</version><scope>test</scope></dependency><dependency><groupId>org.springframework</groupId><artifactId>spring-core</artifactId><version>${springframework.version}</version></dependency><dependency><groupId>org.springframework</groupId><artifactId>spring-beans</artifactId><version>${springframework.version}</version></dependency><dependency><groupId>org.springframework</groupId><artifactId>spring-context</artifactId><version>${springframework.version}</version></dependency><dependency><groupId>org.springframework</groupId><artifactId>spring-web</artifactId><version>${springframework.version}</version></dependency><dependency><groupId>org.springframework</groupId><artifactId>spring-webmvc</artifactId><version>${springframework.version}</version></dependency><dependency><groupId>org.springframework</groupId><artifactId>spring-jdbc</artifactId><version>${springframework.version}</version></dependency><dependency><groupId>org.springframework</groupId><artifactId>spring-orm</artifactId><version>${springframework.version}</version></dependency><dependency><groupId>org.springframework</groupId><artifactId>spring-tx</artifactId><version>${springframework.version}</version></dependency><dependency><groupId>org.hibernate</groupId><artifactId>hibernate-entitymanager</artifactId><version>4.3.5.Final</version></dependency><dependency><groupId>com.h2database</groupId><artifactId>h2</artifactId><version>1.4.189</version></dependency><dependency><groupId>javax.servlet</groupId><artifactId>javax.servlet-api</artifactId><version>3.1.0</version><scope>provided</scope></dependency><dependency><groupId>org.hibernate</groupId><artifactId>hibernate-core</artifactId><version>4.3.5.Final</version></dependency><dependency><groupId>com.fasterxml.jackson.core</groupId><artifactId>jackson-databind</artifactId><version>${jackson.library}</version></dependency><dependency><groupId>ch.qos.logback</groupId><artifactId>logback-core</artifactId><version>1.2.3</version></dependency><dependency><groupId>org.slf4j</groupId><artifactId>slf4j-api</artifactId><version>1.7.30</version></dependency><dependency><groupId>com.zaxxer</groupId><artifactId>HikariCP</artifactId><version>3.4.5</version></dependency></dependencies><build><finalName>SpringRestApp</finalName><plugins><plugin><groupId>org.apache.maven.plugins</groupId><artifactId>maven-compiler-plugin</artifactId><configuration><source>1.8</source><target>1.8</target></configuration></plugin></plugins></build></project>
Notice the size of pom.xml in the code above. There are more than 100 lines of configuration for just a small web application. We had to add a lot of dependencies for a simple CRUD application to work, such as follows:
- Spring Core
- Spring Context
- Spring Web
- Spring WebMVC
- Spring ORM
- Spring TX
Deploying the application
For this, we must have Tomcat and other required setups available in our machine.
Steps to Deploy
-
Generate artifact: We’lluild the application using Maven. All the IDEs have very good support for build tools. Then, we’ll execute
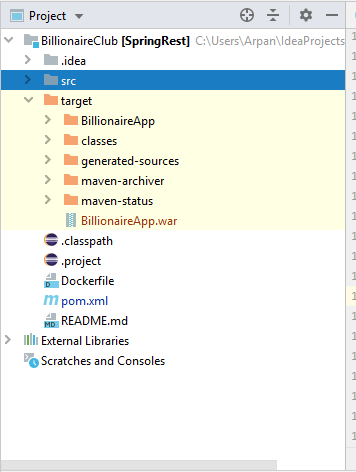
mvn clean installfrom IDE, and the artifact will be created in the application target directory. -
Copy war to Tomcat: We’ll locate
/webappdirectory inside Tomcat directory structure, and copy generated war artifacts from target to the folder. -
Run the application: Inside the
/binfolder of Tomcat we will either seestart.batorstart.shdepending on our OS. We will run the application using the start command.
Verification
Once the server starts successfully, we will see the following log statement on our console.
27-Mar-2021 18:18:55.459 INFO [main] org.apache.catalina.core.StandardEngine.startInternal Starting Servlet engine: [Apache Tomcat/9.0.37]
27-Mar-2021 18:18:55.483 INFO [main] org.apache.catalina.startup.HostConfig.deployWAR Deploying web application archive [\apache-tomcat-9.0.37\apache-tomcat-9.0.37\webapps\BillionaireApp.war]
.
.
27-Mar-2021 18:19:06.131 INFO [main] org.apache.coyote.AbstractProtocol.start Starting ProtocolHandler ["http-nio-8080"]
27-Mar-2021 18:19:06.155 INFO [main] org.apache.catalina.startup.Catalina.start Server startup in [10769] milliseconds
Now the server has started successfully. Next, we are going to hit the REST endpoints and verify the output.
Live application
/*
 * Copyright 2007-present the original author or authors.
 *
 * Licensed under the Apache License, Version 2.0 (the "License");
 * you may not use this file except in compliance with the License.
 * You may obtain a copy of the License at
 *
 *      http://www.apache.org/licenses/LICENSE-2.0
 *
 * Unless required by applicable law or agreed to in writing, software
 * distributed under the License is distributed on an "AS IS" BASIS,
 * WITHOUT WARRANTIES OR CONDITIONS OF ANY KIND, either express or implied.
 * See the License for the specific language governing permissions and
 * limitations under the License.
 */
import java.net.*;
import java.io.*;
import java.nio.channels.*;
import java.util.Properties;

public class MavenWrapperDownloader {

    private static final String WRAPPER_VERSION = "0.5.6";
    /**
     * Default URL to download the maven-wrapper.jar from, if no 'downloadUrl' is provided.
     */
    private static final String DEFAULT_DOWNLOAD_URL = "https://repo.maven.apache.org/maven2/io/takari/maven-wrapper/"
        + WRAPPER_VERSION + "/maven-wrapper-" + WRAPPER_VERSION + ".jar";

    /**
     * Path to the maven-wrapper.properties file, which might contain a downloadUrl property to
     * use instead of the default one.
     */
    private static final String MAVEN_WRAPPER_PROPERTIES_PATH =
            ".mvn/wrapper/maven-wrapper.properties";

    /**
     * Path where the maven-wrapper.jar will be saved to.
     */
    private static final String MAVEN_WRAPPER_JAR_PATH =
            ".mvn/wrapper/maven-wrapper.jar";

    /**
     * Name of the property which should be used to override the default download url for the wrapper.
     */
    private static final String PROPERTY_NAME_WRAPPER_URL = "wrapperUrl";

    public static void main(String args[]) {
        System.out.println("- Downloader started");
        File baseDirectory = new File(args[0]);
        System.out.println("- Using base directory: " + baseDirectory.getAbsolutePath());

        // If the maven-wrapper.properties exists, read it and check if it contains a custom
        // wrapperUrl parameter.
        File mavenWrapperPropertyFile = new File(baseDirectory, MAVEN_WRAPPER_PROPERTIES_PATH);
        String url = DEFAULT_DOWNLOAD_URL;
        if(mavenWrapperPropertyFile.exists()) {
            FileInputStream mavenWrapperPropertyFileInputStream = null;
            try {
                mavenWrapperPropertyFileInputStream = new FileInputStream(mavenWrapperPropertyFile);
                Properties mavenWrapperProperties = new Properties();
                mavenWrapperProperties.load(mavenWrapperPropertyFileInputStream);
                url = mavenWrapperProperties.getProperty(PROPERTY_NAME_WRAPPER_URL, url);
            } catch (IOException e) {
                System.out.println("- ERROR loading '" + MAVEN_WRAPPER_PROPERTIES_PATH + "'");
            } finally {
                try {
                    if(mavenWrapperPropertyFileInputStream != null) {
                        mavenWrapperPropertyFileInputStream.close();
                    }
                } catch (IOException e) {
                    // Ignore ...
                }
            }
        }
        System.out.println("- Downloading from: " + url);

        File outputFile = new File(baseDirectory.getAbsolutePath(), MAVEN_WRAPPER_JAR_PATH);
        if(!outputFile.getParentFile().exists()) {
            if(!outputFile.getParentFile().mkdirs()) {
                System.out.println(
                        "- ERROR creating output directory '" + outputFile.getParentFile().getAbsolutePath() + "'");
            }
        }
        System.out.println("- Downloading to: " + outputFile.getAbsolutePath());
        try {
            downloadFileFromURL(url, outputFile);
            System.out.println("Done");
            System.exit(0);
        } catch (Throwable e) {
            System.out.println("- Error downloading");
            e.printStackTrace();
            System.exit(1);
        }
    }

    private static void downloadFileFromURL(String urlString, File destination) throws Exception {
        if (System.getenv("MVNW_USERNAME") != null && System.getenv("MVNW_PASSWORD") != null) {
            String username = System.getenv("MVNW_USERNAME");
            char[] password = System.getenv("MVNW_PASSWORD").toCharArray();
            Authenticator.setDefault(new Authenticator() {
                @Override
                protected PasswordAuthentication getPasswordAuthentication() {
                    return new PasswordAuthentication(username, password);
                }
            });
        }
        URL website = new URL(urlString);
        ReadableByteChannel rbc;
        rbc = Channels.newChannel(website.openStream());
        FileOutputStream fos = new FileOutputStream(destination);
        fos.getChannel().transferFrom(rbc, 0, Long.MAX_VALUE);
        fos.close();
        rbc.close();
    }

}
Hitting REST endpoints
For this, we need to have Postman already installed. Postman has a feature to import existing collections, which displays the required endpoint on the Postman UI.
You can download the attached collection of endpoints from the appendix section at the end of the course and import it to the Postman installed on your machine.
Code examples
The source code link for all the examples in the course is available in the appendix section.
Key takeaways
Doesn’t all that we’ve discussed seem like too much work to develop a simple application? If we decide to develop another application, a lot of effort will be wasted in doing the work again. This includes finding dependency, Datasource and REST endpoint configuration, and deployment.
This is why it would be great if all those initial configurations and setups are taken care of by the framework, so we can focus on writing the business logic. Spring Boot will help us here.
In the next lesson, we will see how the programming model provided by Spring Boot simplifies the development process for us.