Working with Angular CLI
Explore how to install and work with Angular CLI to streamline Angular development. Understand commands to create projects, generate components, directives, services, and modules. Learn to serve and test applications efficiently using the CLI, including handling routing and style configurations to customize your projects.
We'll cover the following...
To build Angular applications, you need many dependencies, a web development server, packages, all connected to each other. But doing all this from scratch every time is tedious. That’s where Angular’s command-line tool, the Angular CLI, comes in.
The Angular CLI provides us with all the required dependencies. Boilerplates take care of the webpack configuration, unit test configuration, and transpile TypeScript files to JavaScript.
To install the Angular CLI on your local machine, you can use the node package manager npm.
You can download Node.js from your browser using the link as per your operating system.
Install Node.js
https://nodejs.org/en/download/
As per your operating system, choose the right source file to download from the options given:
Once installed, you can check to confirm if Node.js has been installed properly on your machine, using the command:
node -version OR node -v
When you install Node.js, it also installs the package manager npm. To check if npm is installed properly on your machine, use the command:
npm -version OR npm -v
Now, you can move forward with installing the Angular CLI, using the command:
npm install -g @angular/cli
To check if Angular CLI is installed properly, use the command:
ng version OR ng v
The Angular CLI version
As you will notice the version mismatch in the image and the terminal is due to using latest in the command as every time we install angular CLI, we get the latest Angular version.
With the Angular CLI installed, you are good to go. Now, you can create an Angular project with the help of the Angular CLI, and the CLI does the work for you like injecting the required services, getting boilerplates, etc.
To create a new Angular project with the help of the CLI, use the command:
ng new <project-name>
In the newer versions of Angular, when you create a new project, the CLI asks if you want to add routing and builds the project accordingly. We will discuss routing later in this lesson. The CLI also asks which styling framework you would like to use. You can choose any of those as per your requirements. It will then start building your project.
Once your application is created, you can open it inside your code editor. To open it inside Visual Studio Code, use the command:
code .
This will open the newly created project inside Visual Studio Code when you are working locally. However if you try the command on the integrated terminal, code will not be recognised as a command.
After creating the application successfully, the folder structure will look like this.
To compile your application, use this command:
ng serve
Run this command inside your Angular project. This will give you the introduction view of any Angular Application with the title as the name of your project.
Available CLI options
Here is a list of flags you can use while creating a new app:
  --collection (-c)
    A collection of schematics to use in generating the initial app.
  --commit
    Initial git repository commit information.
  --create-application
    When true (the default), creates a new initial app project in the src folder of the new workspace. When false, creates an empty workspace with no initial app. You can then use the generate application command so that all apps are created in the projects folder.
  --defaults
    When true, disables interactive input prompts for options with a default.
  --directory
    The directory name to create the workspace in.
  --dry-run (-d)
    When true, runs through and reports activity without writing out results.
  --enable-ivy
    When true, creates a new app that uses the Ivy rendering engine.
  --force (-f)
    When true, forces overwriting of existing files.
  --help
    Shows a help message for this command in the console.
  --inline-style (-s)
    When true, includes styles inline in the component TS file. By default, an external styles file is created and referenced in the component TS file.
  --inline-template (-t)
    When true, includes template inline in the component TS file. By default, an external template file is created and referenced in the component TS file.
  --interactive
    When false, disables interactive input prompts.
  --minimal
    When true, creates a project without any testing frameworks. (Use for learning purposes only.)
  --new-project-root
    The path where new projects will be created, relative to the new workspace root.
  --prefix (-p)
    The prefix to apply to generated selectors for the initial project.
  --routing
    When true, generates a routing module for the initial project.
  --skip-git (-g)
    When true, does not initialize a git repository.
  --skip-install
    When true, does not install dependency packages.
  --skip-tests (-S)
    When true, does not generate "spec.ts" test files for the new project.
  --style
    The file extension or preprocessor to use for style files.
To look at the different options available, we can use the flag help:
ng help
CLI prompts
When we create a new application using the CLI, starting version 7, Angular asks if we want some features in our application and customizes them accordingly:
For example:
Would you like to add routing to your app? (y/n)
If yes, it would create a dedicated routing module for us to define our routes.
To create a component from the CLI, use:
ng generate component <component-name> OR ng g c <component-name>
We can create a directive in Angular by using the command:
ng generate directive <directive-name> OR ng g d <directive-name>
To create a service from the CLI, use the command:
ng generate service <service-name>
OR
ng g s <service-name>
Compile the application:
ng serve
We can also create modules using the command:
ng generate module <module-name>
OR
ng g m <module-name>
When running 2-3 applications at the same time, you can change the default port to ensure that different applications can run simultaneously on different ports.
ng serve --port 4400
We can also test an Angular application using ng test. This runs Karma testing behind the hood and runs unit tests on our application.
You can check the different flag options by using:
Several other CLI commands that can be used include ng deploy, ng lint, ng analytics, etc. You can refer to the Angular documentation to go through all of these.
For this course, we have an integrated CLI, and you can run the application and the code examples in the integrated environment.
Integrated CLI
Look at the demo project below. This is only to show the usage of the integrated terminal and thus, none of the controls function yet. The output expected will be something like this:
Expected Output:
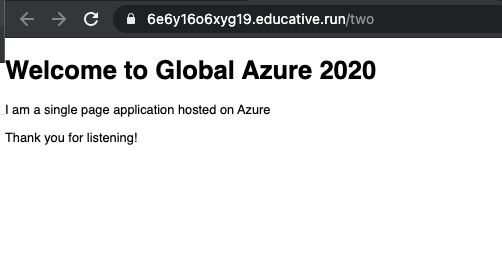
In the following SPA widget, you will see a Run button that serves the application and creates an output for us to have a look at the rendered view.
import { AppPage } from './app.po';
import { browser, logging } from 'protractor';

describe('workspace-project App', () => {
  let page: AppPage;

  beforeEach(() => {
    page = new AppPage();
  });

  it('should display welcome message', () => {
    page.navigateTo();
    expect(page.getTitleText()).toEqual('reSkill app is running!');
  });

  afterEach(async () => {
    // Assert that there are no errors emitted from the browser
    const logs = await browser.manage().logs().get(logging.Type.BROWSER);
    expect(logs).not.toContain(jasmine.objectContaining({
      level: logging.Level.SEVERE,
    } as logging.Entry));
  });
});