Widgets and how to use them
For an overview of the widget below, check out this video.
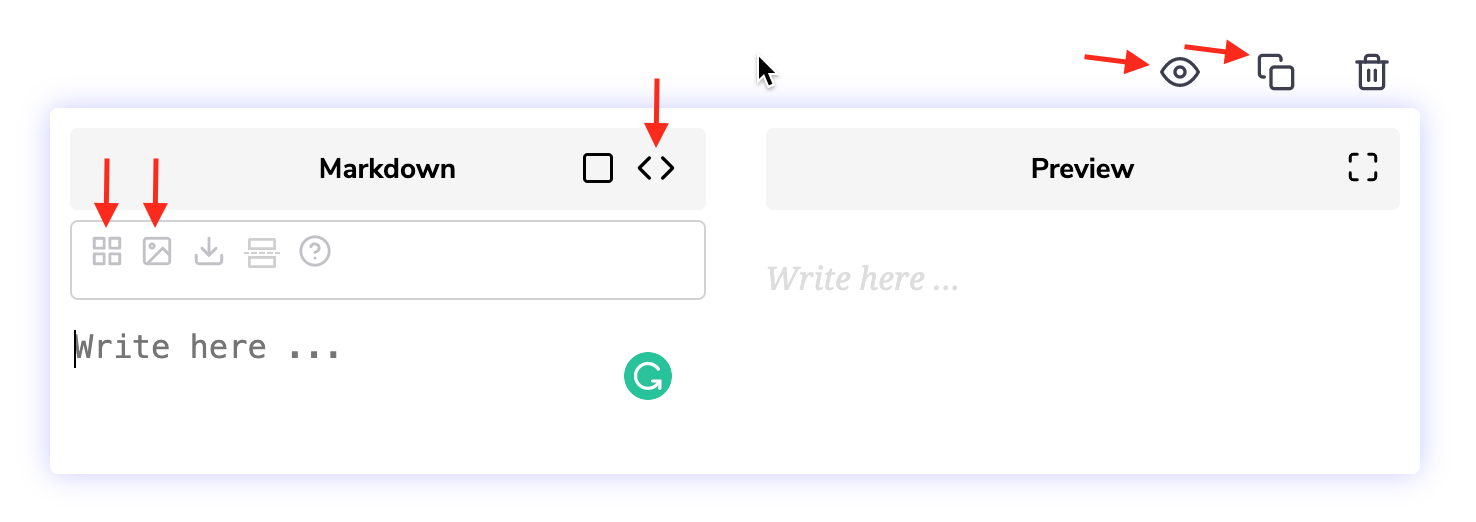
Markdown Widget
A major use of Markdown is to write content. You’ll mostly be using it to write text. To avoid long and boring paragraphs, the markdown allows you to format your text in various ways.
Adding Text
Write Markdown text in the left-hand side window. It will be displayed as stylised text in the window on the right.
Adding Images
You can upload images within Markdown by using the button shown above. A URL will be generated for the image and added at the current cursor position. We’ll see an example later in this lesson.
Formatted Markdown
Clicking on <> converts the Markdown into a formatted form. In this form, browser spell checks won’t be enabled and you won’t be able to run Grammarly either.
View and Copy
All the widgets contain “View” and “Copy” options. “View” allows you to view the content in the widget in preview mode.
“Copy” allows you to duplicate the widget in the same lesson without having to create a new one.
| Name | Syntax |
|---|---|
| H1 heading | # |
| H2 heading | ## |
| H3 heading | ### |
| H4 heading | #### |
| Highlight terms | `I am highlighted` |
| Bold | **Bold** |
| Italic | *Italic* |
| Bold Italic | *_Bold Italic_* |

Adding code
You can add code with the use of the code widget.
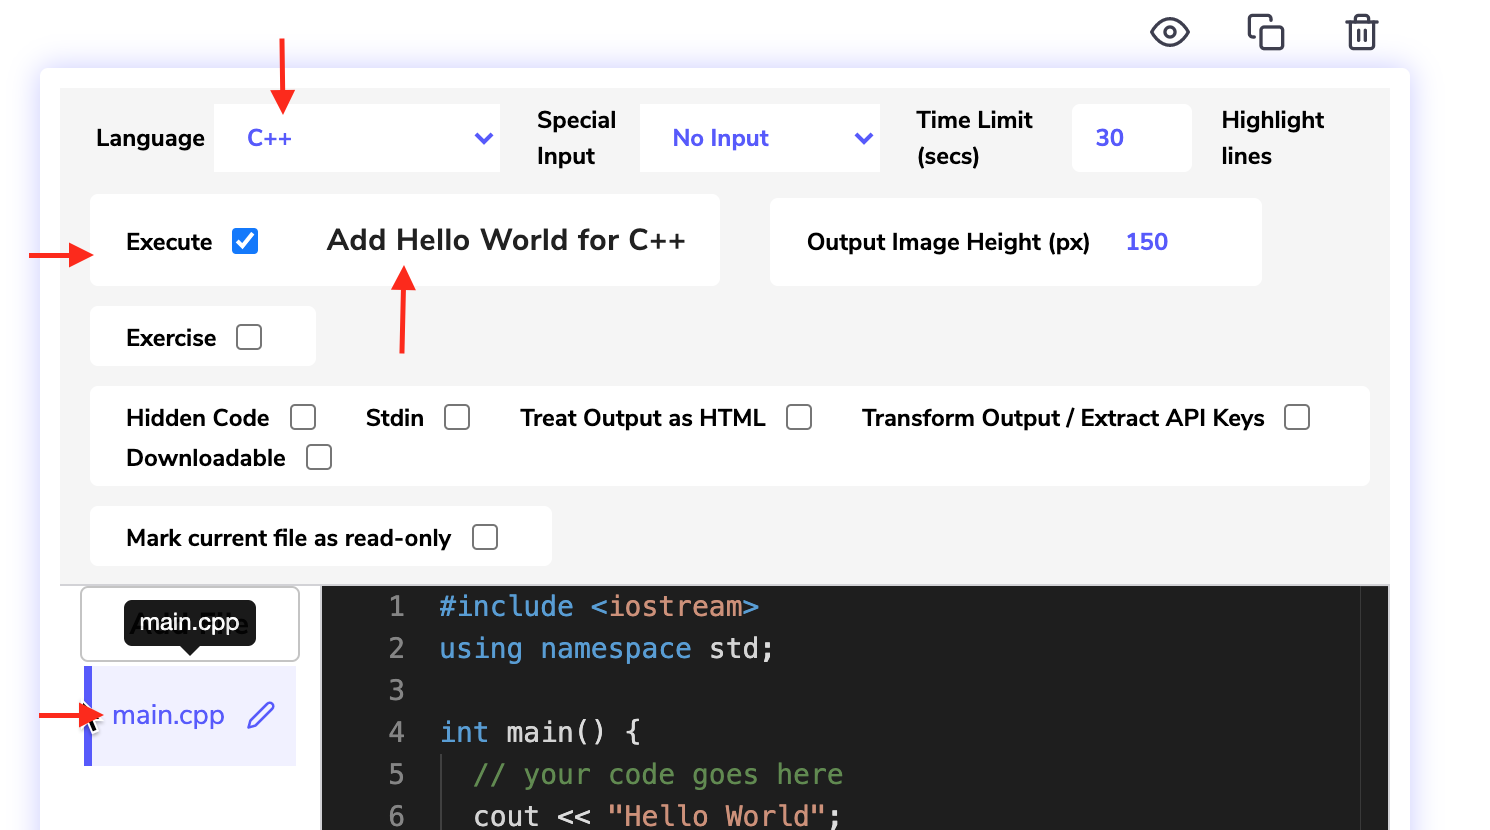
The Code Widget allows you to:
-
Choose your programming language of choice.
-
Execute/run the code.
-
Highlight specific lines or code blocks.
-
add input files
-
Take input from the user.
These are the most relevant features related to Edpresso.


Run JS Widget
The Run JS widget can be used to create webpages that support JavaScript. You can write HTML, CSS, and JavaScript for your page. It is the perfect tool to incorporate client-side development in your course.
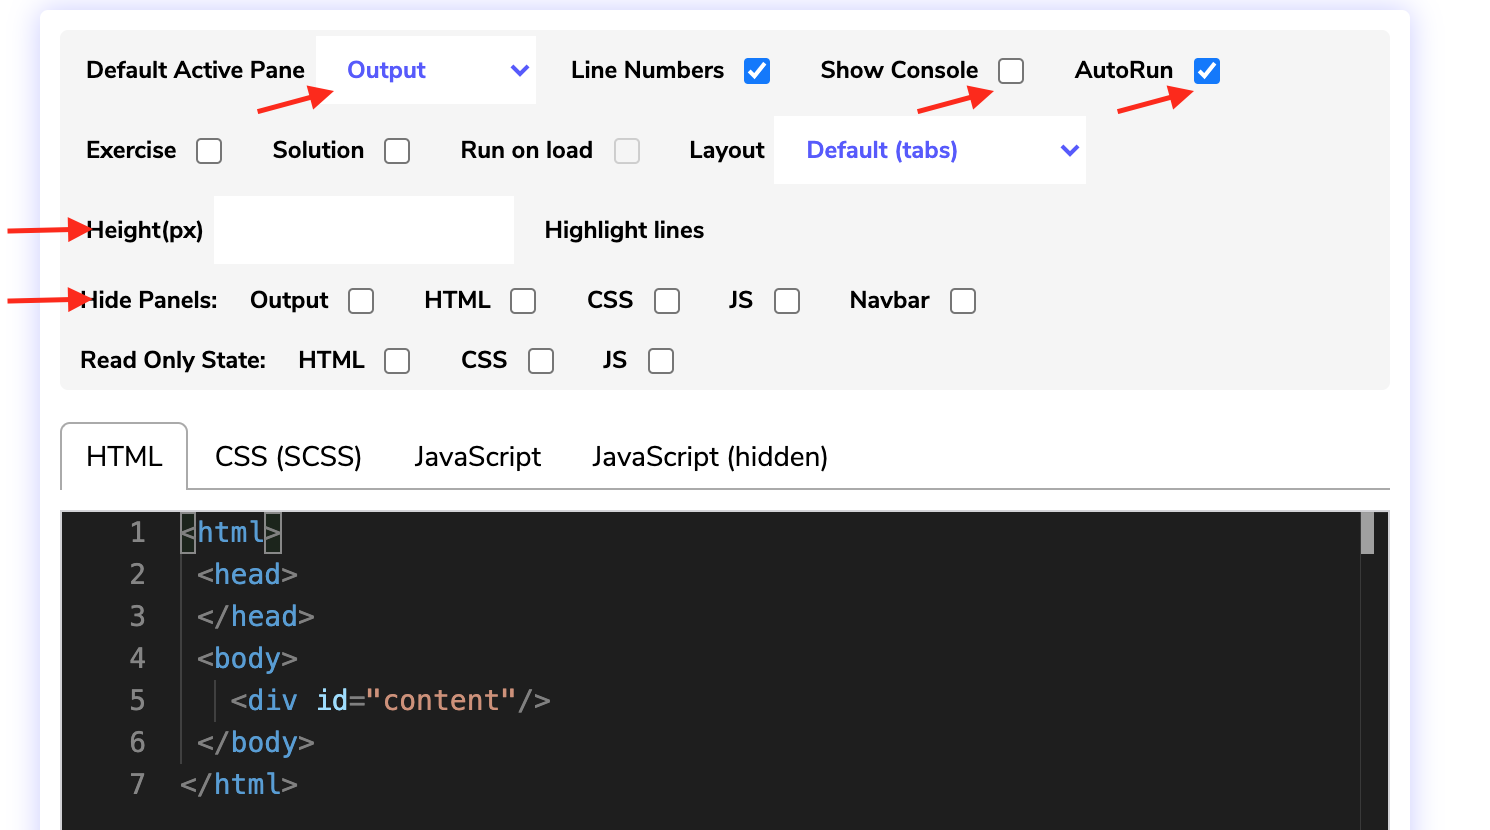
Default Active Pane
The default active pane is the tab that users will initially see when they view your widget. You can choose between Output, HTML, CSS, and JavaScript. The Output tab displays your webpage, so it is recommended as the default active pane.
Line numbers
Checking this shows the line numbers in the code widget. Unchecking it hides the line numbers.
Show Console
Apart from the HTML output, you can also observe the activity on the console by enabling this feature.
AutoRun
Any change you make to the implementation will automatically render on your page. If this is disabled, users will have to press Run to view the page.
When this option is disabled, a user will have to run the program by clicking the “Run” button for the console output to appear otherwise the console will be empty.
Toggling this option will run the code automatically when the lesson is loaded so that the program’s console output is visible without having to manually run the program
Hide Panels
The panel(s) which you select in this list will not be visible to the user.

Single Page App
The SPA widget allows you to create simple and complex applications wherever you need them in the lesson. SPA widget has six default loaders.
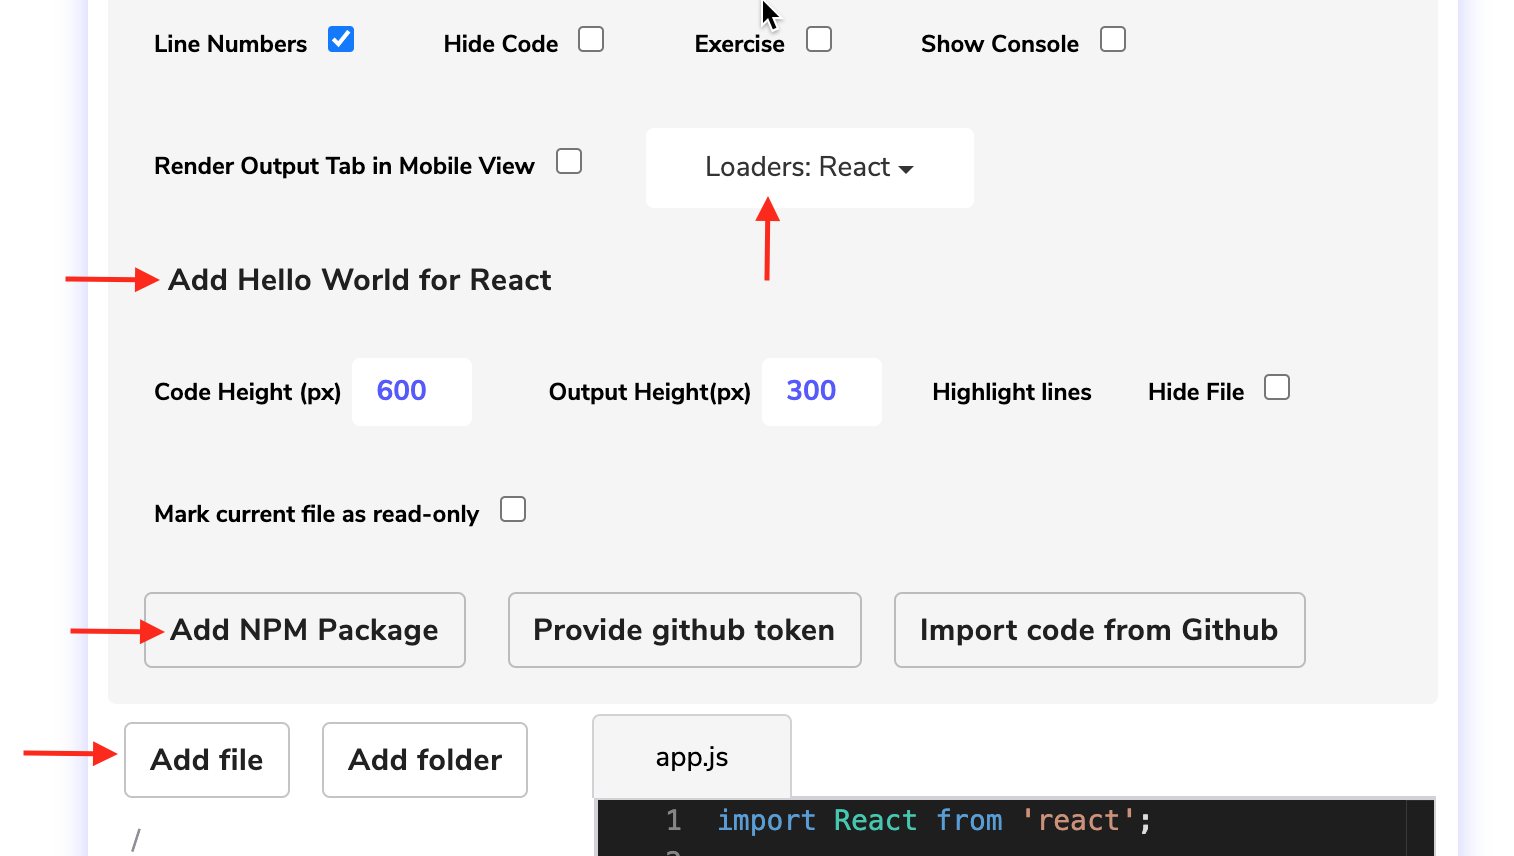
Loaders
Loaders drop-down menu has six options from which you can choose:
- React
- Dart
- Typescript react
- Elm
- Vue.js
- GoJS React
Add NPM Package
Here, you can define all the packages you will need for your program. Simply search it by name. If you want a specific version of the package, just write the version next to it!
Directory
This is where you create all your files and folders. You can make as many subfolders as you want. Simply drag and drop files/folders to wherever they need to be.
Drawing Tool
The Drawing widget has functionality that allows you to create:
- UML diagrams
- Venn diagrams
- Flowcharts
- Cartoon images
- Edpresso images
However, its use is not restricted to just these 4 types. It gives you the freedom to draw as you please!
The widget also supports the import of images from the web.
On the left side, you have the options for adding various assets and diagrams. Edpresso has a large repository of ready-made illustrations that can be used in the for various shots.
