Intro to Docker 2 - Docker-compose and packaging a SpringBoot app
Introduction
In the previous article, we saw what Docker is, how containers are useful as a new devOps trend, and learned the difference between containers and images. We also learned about Dockerfile.
Now, we will learn about the docker-compose command and how to run a SpringBoot application from a local container. But, before doing that, we need to package a SpringBoot application with Docker. Let’s see how to do it.
Dockerizing a SpringBoot application
The first thing we will do is get a basic SpringBoot based application that we can docker-ize. For that purpose, we can use the basic application that comes with Spring scaffolding when using the Spring Initializr in IntelliJ, and we can add a very simple endpoint that will return a greeting message in JSON format.
It doesn’t really matter if you do not have Spring Initializr as long as you can expose an endpoint and query it via either the mockMvc test object or a tool like Postman.
For reference, here is our application package structure:
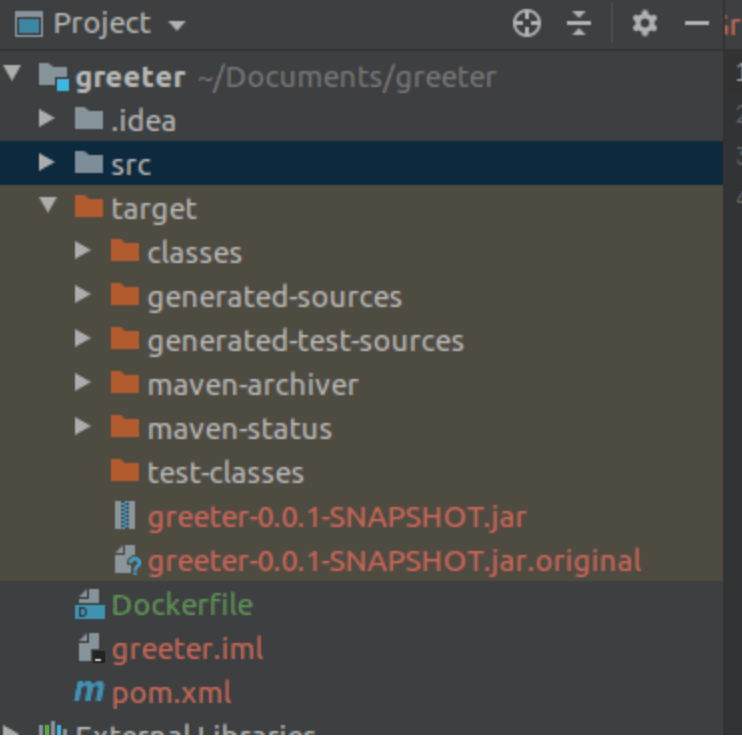
You may notice that the Dockerfile is placed at the root folder of the whole project. This will be the file used to control all the details of our image, its specification.
Then, the file will be used to create a Docker image, and from that image, once it’s effectively running, we will have our container.
To Dockerize our SpringBoot application (or any application), it’s required that we specify in our Dockerfile all that we need in order to run our application. It needs to be, in essence, a layered description of all the steps we would take to build and run our application, locally, in a format that can be:
- reproducible: A Dockerfile should always result in the same image once it’s run and fully specified. Anyone using that image will always get the exact same functionality.
- environment-independent: In essence, the power of Docker relies on the fact that many infrastructure and devOps services now support it in their development pipelines so that, whenever a push of new code to a specified branch happens, it will trigger a complete rebuild of the Docker image. Then, developers can use it via
docker-composeseamlessly, or the latest image will be available in a registry to be exposed as a micro-service to the world via nginx, etc.
Since the only thing we really require in order to start the SpringBoot application after compilation ends is the .jar file containing the compiled code, as long as we use a base Java image to build our own, we can wrap our SpringBoot application in a Docker container by defining the entry point as running the .jar file:
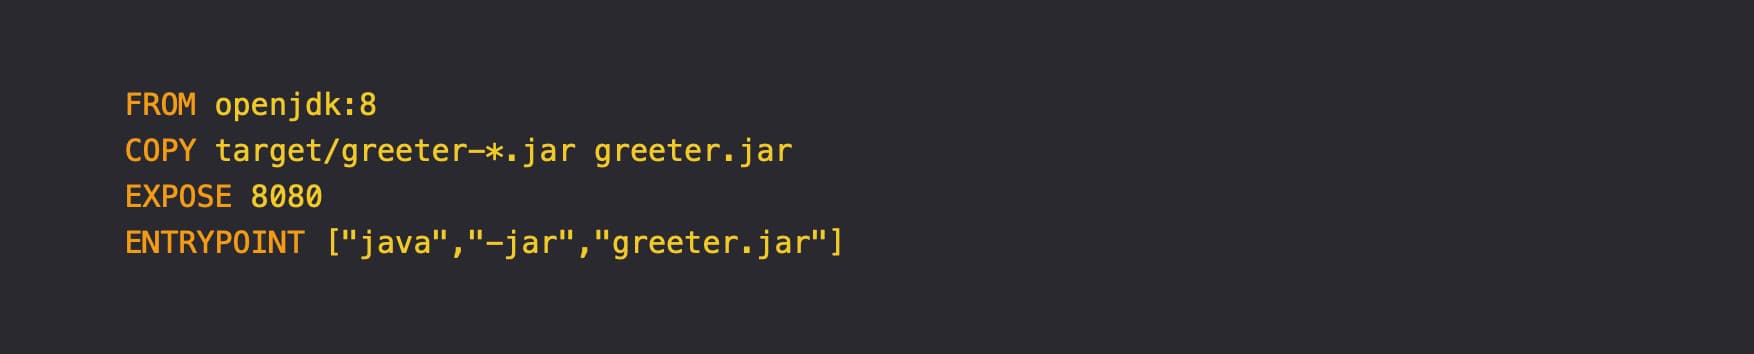
So, we build our image from a Java 8 openJDK base image, then we copy the JAR file (that needs to exist in our local machine at the same folder level as target and the Dockerfile itself) from our local system into the container root directory.
Then, we expose the port 8080 from the container to be available to the outside. This is the same port as the SpringBoot service; otherwise, the container won’t know where the service is running.
Finally, we call Java to start our service from the JAR we just copied into the container from our local machine. This means that when starting a container from the image built through this Dockerfile, we will effectively start the SpringBoot application.
The docker-compose command
The Dockerfile allows us to specify what is required to build an image.
docker-compose is a command that allows us to specify and start multiple services comprised of many Docker images together, in a coordinated way, while allowing us to specify which image to use for which service and ensuring that services are started correctly. It also allows us to define environment variables that are exposed as such to the running container.
Let’s assume our application required a username and password authentication in our endpoint. In order to define these variables, we can write a docker-compose.yml file that we place at the same level as the Dockerfile, and there, we can specify from which Dockerfile to build the container, which image to use (both for local builds and using remote images), which services the composition of containers will use, and the environment variables needed.
A simple docker-compose.yml could be:

We define a service called web that is built from the Dockerfile in the current directory, exposes port 8080 to the outside, and the service running in the container is in port 8080 as well.
Then we define environment variables available to our service, just like we define in an application.properties file or a shell.
To use this file to start a container, we simply do:
docker-compose -f <path to compose file> -d up
This will use the compose file to build and instantiate our container and start the service configured with that environment.
-d ensures that the container keeps running in the background and up starts it.
Compose allows developers to pull an image locally on their machines, run it, and test it locally, which is very useful.
Conclusion
We saw what docker-compose is, how it helps developers test certain functionalities, and how it isolates concerns in a controlled environment. We also saw what is needed to package a SpringBoot application with Docker. Stay tuned for more!
RELATED TAGS
CONTRIBUTOR
- undefined by undefined
