What is user pool in AWS cognito?
User pool
AWS Cognito user pool is a way to provide Authentication to a user of an Application. It is represented as a user directory in Amazon Cognito.
The authentication mechanism provided by AWS Cognito User Pools is:
- Social Identity Providers
- SAML Identity Providers
AWS Cognito User Pools provide authentication or act as an identity provider
In Federation, the Identity provider stores the user information. When AWS Cognito User Pools are used as the identity provider, the user directory of AWS Cognito stores the user login details; else, its store in the identity providers’ storage.
The user directory is accessible by an SDK. This can be used by applications to access user profiles.
AWS Cognito User pool provide:
- Sign-up and sign-in service
- A built-in, customizable web-UI for users to register
- Social sign-in with the social identity provider
- User directory management and user profile
- MFA
Once a user is authenticated, the application receives a
Configure user pool
When you select AWS Cognito in AWS console, you get this screen: .

Since you will configure the User Pool, let’s choose the User Pool Option:

To Make life easier, you can select the Review Defaults, which provides you with a good, basic user pool.
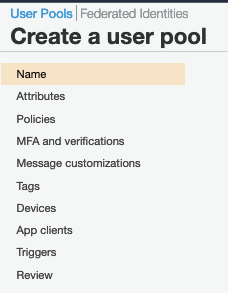
You can also choose to configure each of these ten settings:
Customizing all the settings for user pool creation would be beyond the scope of this Blog. Let’s take these two approaches:
- Create a user pool with the default option
- Add an App to enable the hosted WebUI
Create a user pool (default)
- Step 1: Select the “Create a user pool”.
- Step 2: It provides us with the following screen.
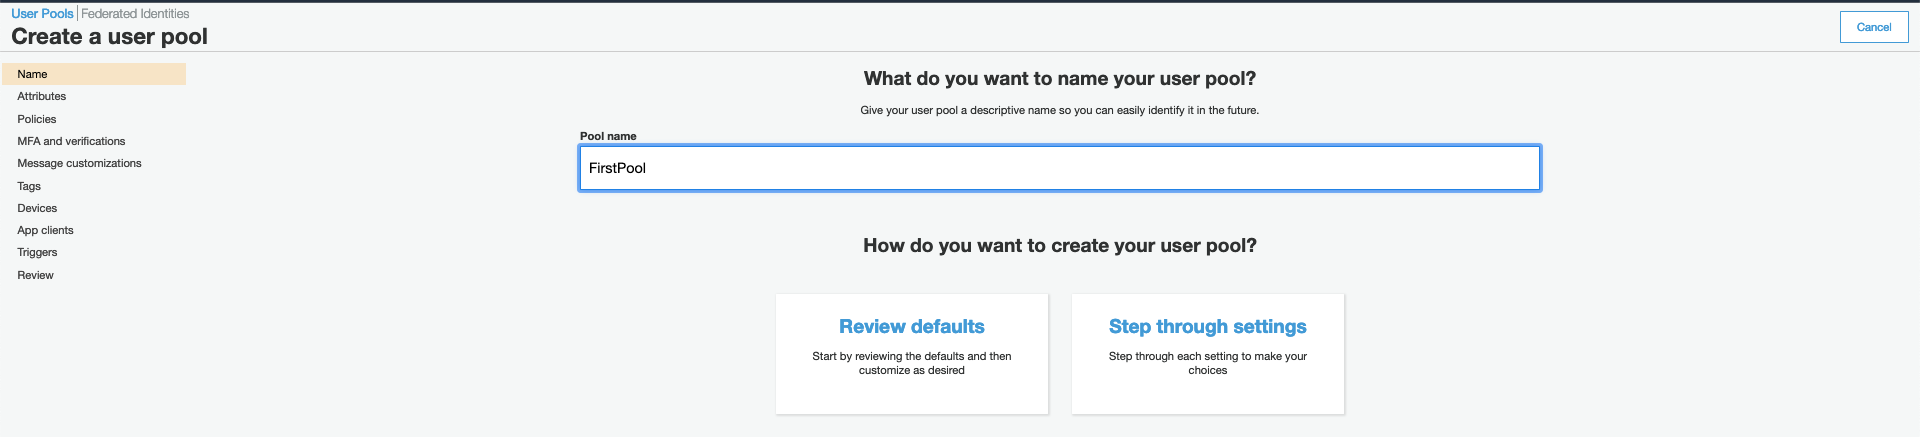
- Step 3: Provide a name for Pool, and press the Review Defaults.
- Step 4: On pressing the Review Defaults, you get the following Review screen.
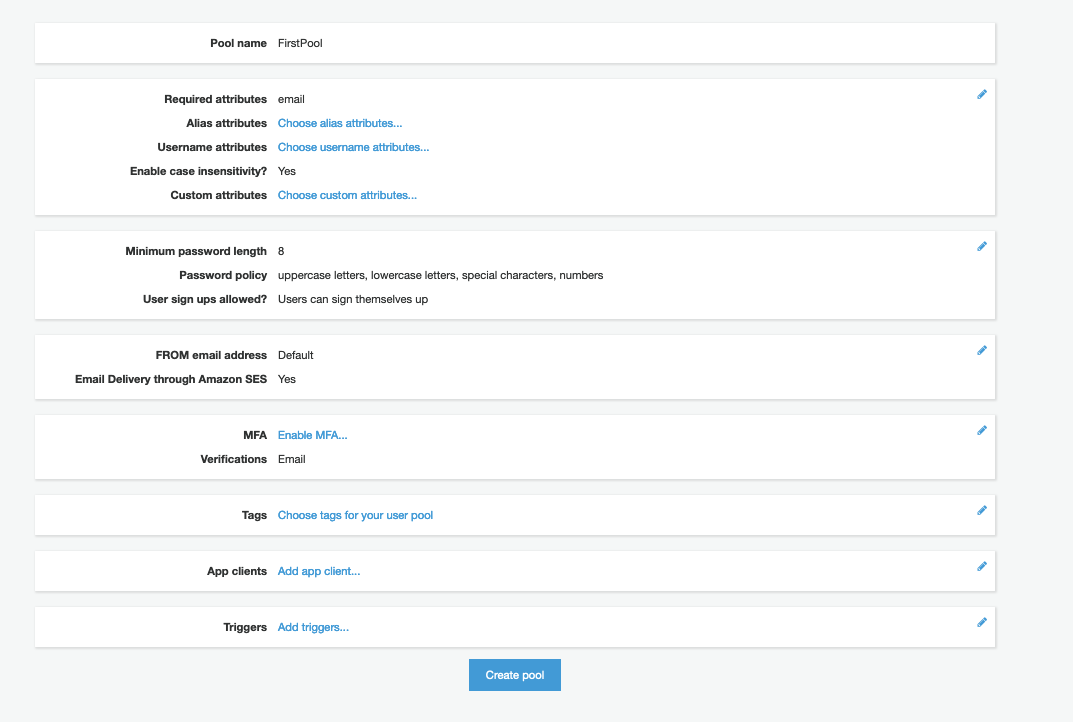
The review pages tell us the following information:
- Pool Name
- Email is a required attribute
- There are password policies
- How the message’s for AWS Cognito need to be communicated
- MFA is enabled or not
- Tags are created or not
App Clients are like Triggers to configure, like pre-sign up and pre-authentication.
If you carefully watch the Review page and the steps to create a user pool, they will match.
- Step 5: Press the Create Pool button and your User Pool will be created.

Congrats on creating the default user pool!
Now, you should check out the Hosted UI provided by AWS Cognito for sign-up and login.
Add an app to enable the hosted web UI
AWS Cognito even goes a step further into offloading your user management work as it provides a user sign-in and login page as a hosted web. Let’s see, how can you configure this.
You will use the default user pool created before. Once you have created a User Pool, you can edit a lot of attributes provided here.
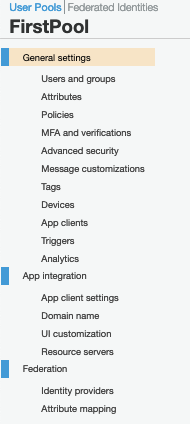
To Use the hosted WebUI, you will focus on the App Integration property of the user pool.
- Step 1: Select App Integration from Setting of User Pool
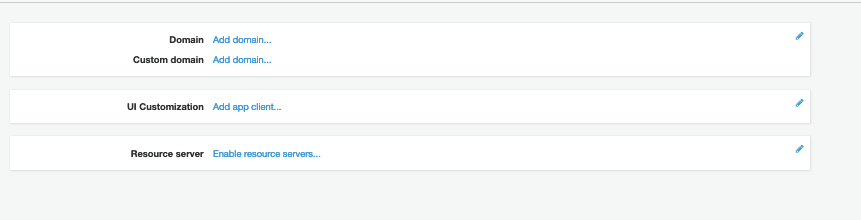
To get the Web Hosted UI, you have to use this configuration. If you have your own domain, provide your custom domain; else, use the AWS domain.
- Step 2: Add Domain
On choosing the Add Domain option, you get this screen.
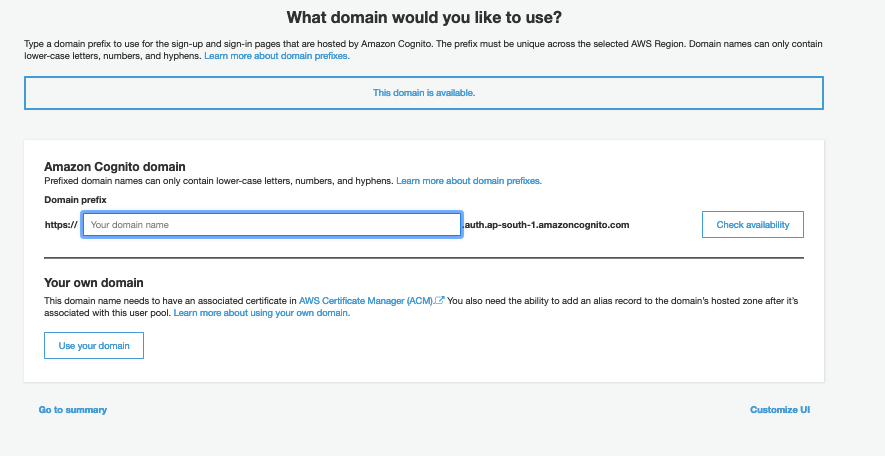
Enter the domain you of your wish and keep a note of it, you will require it later.
- Step 3: Add App Client under General settings – Select the App Client under General Setting, so you can enter the app client attributes.
The screen will look like this:

You should select the Add an app client option. The screen will look like this:
You should provide the name of the client and de-select the Generate client secret option. This option can be used when you have a server-side component to generate the client secret. Once the app client is created, we will move to Step 4.
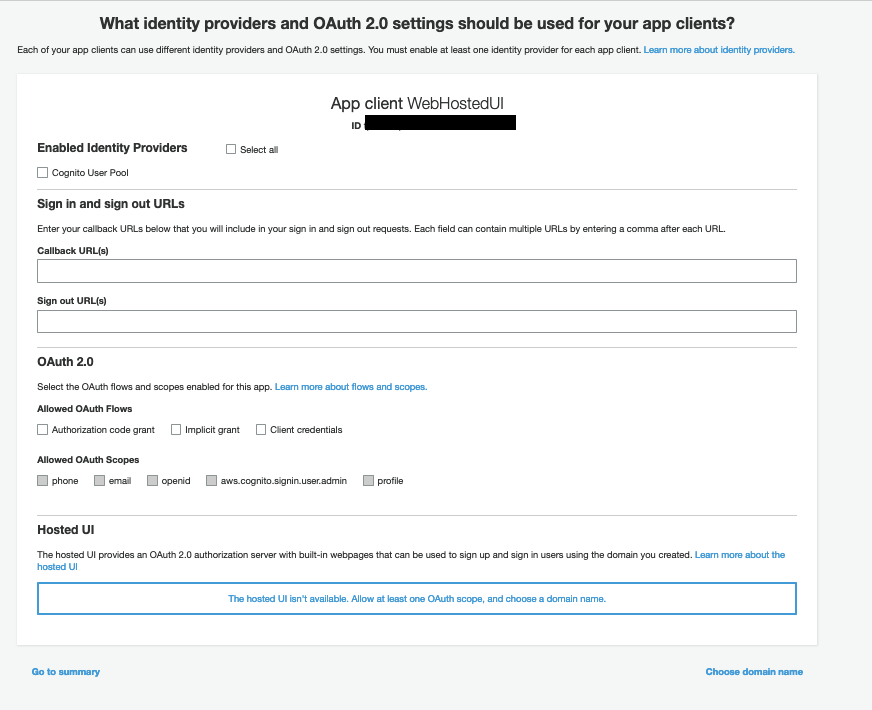
- Step 4 App Client Settings:
Select the App Client Setting, under App Integration. You will get a screen like this.

If you check, the App Client details are already present.
In the above screen, you have to select:
- Cognito User Pool as the enabled identity providers
- Since you are testing provide “http://localhost” as the callback URLs for validation
- Choose Implicit Grant in Allowed OAuth Flows
- Select all the allowed OAuth Scope you want
Save the option.
- Step 5 : Launch the WebHosted UI
At the bottom of the previous screen, there is an option for Launch Hosted UI. Use this option – you should get a sign-up page like this.
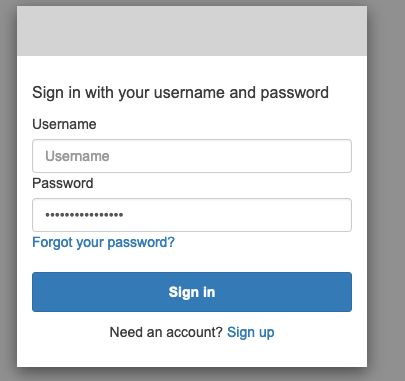
Here is your simple web-hosted for Login and sign up. Although everything may not work, just refer to this as a guideline.
At this point, you can use IAM roles for your application and this authentication to make your application function. However, providing different levels of the authorization will still be the application’s responsibility. If you want to handle this part also, then move to Identity Pool.
Learn more!
RELATED TAGS
CONTRIBUTOR
- undefined by undefined
