Traditional Layouting - Solution with Flexbox

In this lesson, we will learn to fix the traditional layouting problems with Flexbox.

Writing our first Flexbox container

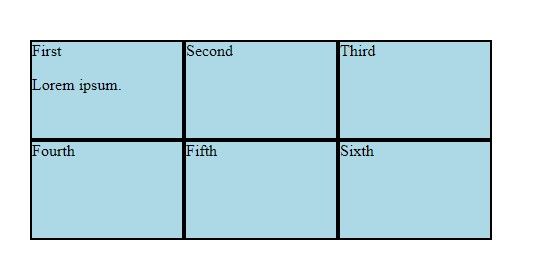
Let’s recall the code from the previous chapter:

<div class="container">
    <div class="col">
        First 
        <p>Lorem ipsum.</p>
    </div>
    <div class="col">Second</div>
    <div class="col">Third</div>
    <div class="col">Fourth</div>
    <div class="col">Fifth</div>
    <div class="col">Sixth</div>
</div>
.container { 
  margin: 50px; 
  padding: 0; 
  font-size: 0;
}

.col { 
  display: inline-block; 
  border: 2px solid black; 
  width: 33.33%; 
  box-sizing: border-box; 
  margin: 0 auto; 
  height: 100px; 
  background-color: lightblue;
  font-size: 16px;
}

After removing the fixes to glue the individual elements together, our layout falls apart:

.container { 
  margin: 50px; 
  padding: 0; 
}

.col { 
  width: 33.33%; 
  border: 2px solid black; 
  box-sizing: border-box; 
  margin: 0 auto; 
  height: 100px; 
  background-color: lightblue; 
}

As expected, without the inline-block display mode, the six divs become blocks, occupying the whole row.

Let’s add display: flex to the container.

.container { 
  margin: 50px; 
  padding: 0;  
  display: flex;
}

.col { 
  width: 33.33%; 
  border: 2px solid black; 
  box-sizing: border-box; 
  margin: 0 auto; 
  height: 100px; 
  background-color: lightblue; 
}

Flexbox squeezes all elements in one row by default. Therefore, the default width of the columns is overridden such that they fit in one line as well as possible.

To override this default behavior, we can tell Flexbox that it is an accepted behavior to display the six elements in multiple rows. The required rule is flex-wrap: wrap; on the container:

.container { 
  margin: 50px; 
  padding: 0;  
  display: flex;
  flex-wrap: wrap;
}

.col { 
  width: 33.33%; 
  border: 2px solid black; 
  box-sizing: border-box; 
  margin: 0 auto; 
  height: 100px; 
  background-color: lightblue; 
}

We got back the expected three-column layout with Flexbox, and we have full control of the dimensions. No glitches are expected despite the absence of comments, font-size fixes, or other non-obvious rules.

Let’s also add some more content to the first element inside the Flexbox to test the robustness of the solution. To give a chance for Flexbox to do its job, let’s also change the height of the elements to min-height:

<div class="container">
    <div class="col">
        First 
        <p>Lorem ipsum.</p>
        <p>Lorem ipsum.</p> 
        <p>Lorem ipsum.</p> 
        <p>Lorem ipsum.</p>
    </div>
    <div class="col">Second</div>
    <div class="col">Third</div>
    <div class="col">Fourth</div>
    <div class="col">Fifth</div>
    <div class="col">Sixth</div>
</div>
.container { 
  margin: 50px; 
  padding: 0;  
  display: flex;
  flex-wrap: wrap;
}

.col { 
  width: 33.33%; 
  border: 2px solid black; 
  box-sizing: border-box; 
  margin: 0 auto; 
  min-height: 100px; 
  background-color: lightblue; 
}

As Flexbox is flexible, it automatically adjusts the height of all containers in the same row such that they all have uniform heights, and all content fits in the first box:

Now that we have finished going through the main example of this lesson, let’s put layouting into practice.

Your first Flexbox exercise

Create the following layout using Flexbox, using solely the features you have already learned.

The layout should be as follows:

  • The height of each container is 100px
  • The width of the whole content area (body) should be 600px
  • The content area should be centered on the screen.

The layout should look as follows:

We will not specify the exact colors. Feel free to use different ones if needed. If you are looking for a challenge, download the ColorPick Eyedropper Google Chrome extension, and try to replicate the exact colors.

We will give you the markup, please write the solution in the CSS area.

Get hands-on with 1200+ tech skills courses.