


Develop an algorithm where the computer randomly selects a number between 1 and 100 using randint(1, 100) and saves it in a variable. Input your guess through either the console or a GUI and compare it with the computer’s choice. If the numbers match, you’ve successfully guessed the correct number! You can also incorporate hints to show whether the guess is higher or lower than the chosen number. Set a predetermined number of allowed guesses, and if you manage to guess within that limit, you win! Otherwise, you lose.
Table of Contents
Python Tkinter Tutorial: build a number guessing game
11 mins read
Jan 15, 2024
Share
This article is part of a Python Tkinter series written by Pratik Shukla. And stay tuned for more Tkinker articles from Pratik!
Tkinter is Python’s standard interface to the Tk GUI (Graphical User Interface) toolkit and the de facto standard GUI in Python. A GUI allows you to interact with a computer using visual items such as windows, icons, and menus, used by most modern operating systems. This a powerful tool useful for building all sorts of projects, and it makes it easier to visualize your Python game code.
In this article, we’ll see basics of Tkinter and different types of widgets we can use in a Python application. Later in this article, we’ll develop a cool Python number guessing game using Tkinter widgets.
The basic steps of designing this game are:
- The program generates a random number between 0 and 9, which the user will guess by entering a value and clicking the check button.
- If the guess is correct, the program displays “CORRECT” along with the number of attempts; if incorrect, it indicates whether the guess is “TOO LOW” or “TOO HIGH” and clears the entry for another attempt.
- Users adjust their guesses based on the program’s feedback, aiming to find the correct number.
- The program tracks and reveals the total number of attempts once the correct guess is made.
- To start a new game, users can press the main close button; exiting the application is done by clicking the close button.
Today, we will cover:
Basics of Tkinter#
Before building our games, we need to know some basics of Tkinter. The Tkinter package is the standard python interface to the Tk GUI toolkit. We generally use Tkinter package to insert different GUI widgets in our application to make it more user friendly. If you work with Python on Linux, Windows, or Mac, Python Tkinter is already installed on your device.
How do we develop a GUI application?#
The basic process for creating a GUI application is as follows:
How to create a GUI application in Python:#
- Import the tkinter module.
- Create the main window for our GUI application.
- Now add as many widgets as we want for our application.
- Enter the main event loop to execute our prime functionalities.
Let’s now see how we can create a simple Tkinter window:
First of all we are going to import tkinter module. It contains all the functions, classes and other things we are going to need to build our application. Now as we have imported the module we need to initialize our tkinter. For that we create Tk( ) root widget. Now this will create our main GUI window in which we are going to add our widgets. At this point our main window have only title bar.
We should create only one window for our application and this window must be created before adding any other widgets in it. After then we use root.mainloop( ). The main window we just created won’t appear unless we enter the mainloop. When we press the close button, our program will exit the main loop. Our application will keep running until we press the close button.
Code used to create a simple Tkinter window:
Widgets of Tkinter with Examples#
- Button: To display button.
- Canvas: To draw shapes.
- Checkbutton: To display number of options as checkbox.
- Entry: To take single line input from user.
- Frame: To organize other widgets.
- Label: To add captions for other widgets.
- Listbox: To provide a list of options to user.
- Menubutton: To display menus in our application.
- Menu: To provide various commands to user.
- Message: To display multiline text fields.
- Radio Button: To display number of options as radio buttons.
- Scale: To provide slider.
- Scrollbar: To add scrolling capability.
- Text: To display text in multiple lines.
- Toplevel: To provide separate window container.
- Spinbox: To select from a fixed entry value.
- PanedWindow: To arrange the widgets horizontally or vertically.
- LabelFrame: To provide space in complex structure.
- tkMessageBox: To display messagebox in application.
Now we’ll take a brief look at some of the widgets we are going to need in out application. Keep in mind that here we’re going to take simplest example demonstrating the widget. There are many more features available in each widgets. We’ll see some of them while developing our game.
A few Tkinter widgets examples#
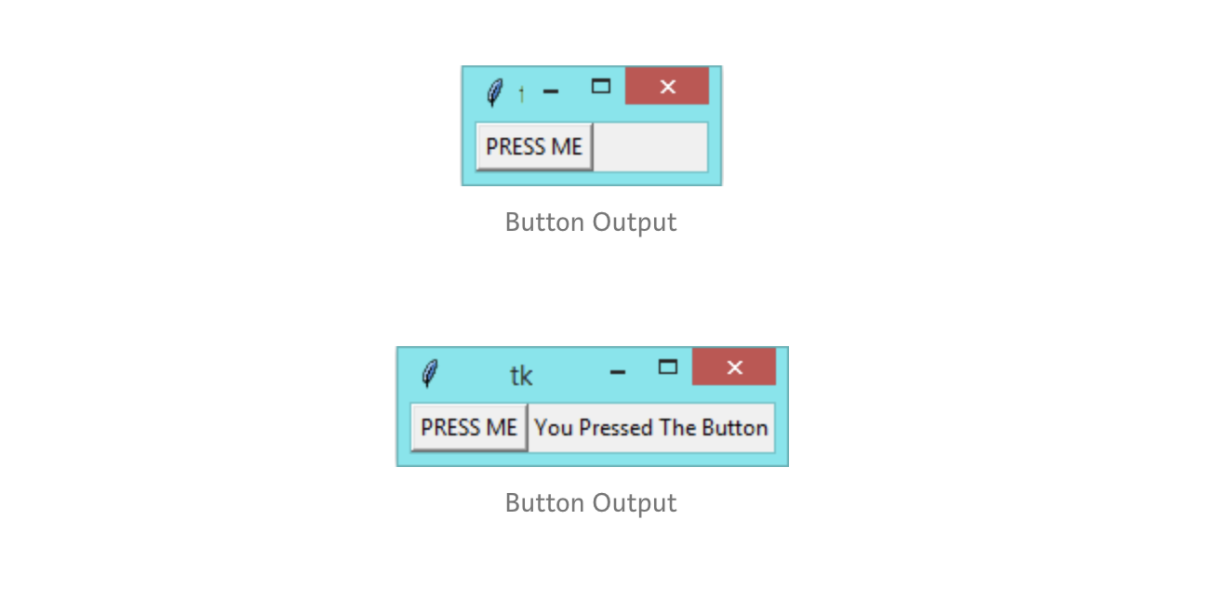
Button: The button widget is used to display buttons in our application. Generally when we press a button there will be a command associated with it.
Label: The label widget is used to provide single line caption for other widgets in our application.
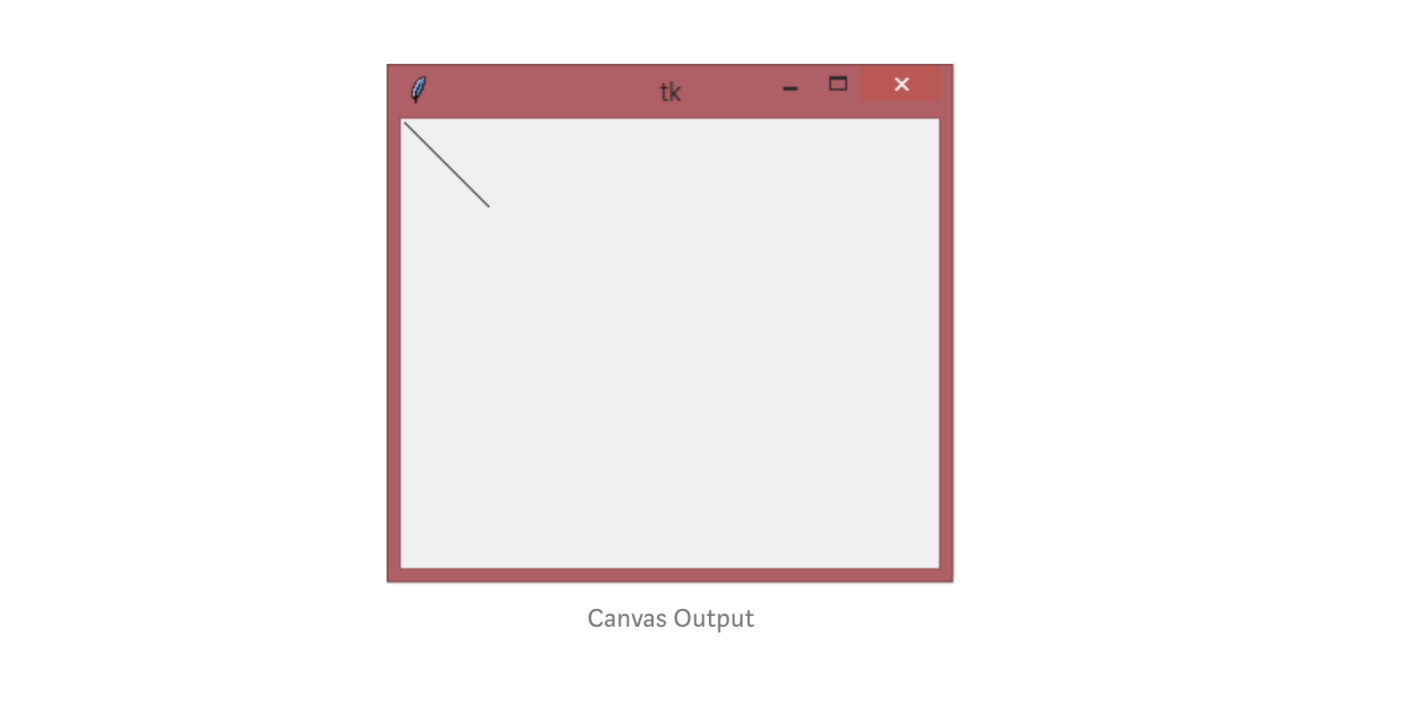
Canvas: The canvas widget is used for drawing various shapes.
CheckButton: We use checkbutton to display multiple options available to users. Here users can choose more than one options.
Entry: The Entry widget is used to take single line input from user.
Frame: It’s used as a container widget to organize other widget in the same application.
Listbox: It’s used to provide list of options to users.
Step-by-step walkthrough#
When the user runs the program, our code will generate a random number between 0–9. The user will be unaware of the randomly generated number. Now the user has to guess the value of the randomly generated number. The user enters the value in the entry box.
After that, the user will press the check button. The button will trigger a function. The function will check whether the number entered by user matches the randomly generated number. If the guessed number is correct, then the program will display the CORRECT label and the actual number (which, in this case, will be same as guessed number).
Now, if the guessed number is less than the randomly generated number, then our program will show the TOO LOW label, and this will also clear the entry box, so that the user can enter a new number.
If the guessed number is higher than the actual number, then our program will show the TOO HIGH label and clear the entry box. This way the user can continue guessing the correct number.
If the label shows TOO HIGH, then the user is supposed to enter a lower number than they guessed. If the label shows TOO LOW, then the user is supposed to enter a higher number than they guessed the first time.
Our program will also count the number of attempts it took the user to guess the correct number. It will show the total attempts when the user finally make the correct guess.
If the user wants to play a new game, they have to press the main close button. If the user presses the CLOSE button in our application then they will exit the game completely.
Putting it in simple steps:
- Run the application.
- Enter your guess.
- Press the check button.
- Guess a new number if the label doesn’t show correct.
- If the label shows correct then show the number of attempts.
- Press the main close button to restart the game with new number.
- Press the close button from our application to exit the game completely.
Final application#
You can download the images and the code files used in the application from here. Or, to see the final code for this game, click here to reach the end of the article.
Let’s code!#
We’ll show you step-by-step how to build the above game using Python Tkinter. Let’s jump right in.
Step 1: Import the required libraries
Step 2: Creating main Tkinter window
- First we create a variable called
want_to_playand set its value toTrue. Our program will generate a new window when the variable is set toTrue. When the user presses the main close button, it will exit the loop, but here we’ve set the variable toTrue, so it will create another window with newly generated number. root = Tk( ): This is used to initialize our tkinter module.root.title( ): We use it to set the title for our application.root.geometry( ): We use this to specify at which location our application window will open.root.configure( ): We use this to specify the background color for our application.root.resizable( ): Here we are using it to prevent the users from resizing our main window.root.iconphoto( ): We are using it to set the icon in the title bar for our application window. We are setting the first parameter toTrue.
Step 3: Importing sound files
Now we will use some sound files that will play at various events. When our program starts it will play start file. We’ll play the rest three files when the user’s guess is correct, when the user’s guess is wrong and when user closes the application respectively. One thing to notice is that it only accepts .wav files. First of all we need to load the sound file in an object. Then we can play it using .play( ) method when required.
Step 4: Loading images for our application
We are going to use various images in our application. To use those images first we need to load those images. Here we are going to use PhotoImage class to load our images.
Step 5: Generating a random number
Here we’re going to generate a random number between 1–9. We are going to use the random module to generate random integer between 1–9.
Step 6: Modify fonts
Here we’ll use the font module to change the fonts in our application.
Step 7: Adding widgets
Here we have added the first two widgets of our application. Notice that the entry box is at row 2 since we have added blank space in row 1. Here we are going to use an image file in our label. We use .grid( ) to specify the location of a particular widget.
Step 8: Creating other widgets
Here we’ll add some other widgets like button and label. There will be two buttons one to check the value and other to close the window permanently. The second label will show whether the value guessed by the user is correct or high or low. It will show the label accordingly. The third label reveals the correct number if user’s guess is correct.
The fourth label reveals the total number of attempts it took the user to guess the correct value. Here notice that the two buttons will trigger a command. We will take a look at that in the next points.
Step 9: Display the correct image and set the counter to the attempt values
Here we are going to display the correct number image when the user’s guess is right. Our digits are stored like:
- 1.png
- 2.png
- 3.png
- …
- 100.png
So our program will take the actual number and add the .png string with it and open that file. We will also set the counter to count the attempt values. It will store the value of number of attempt it take user to guess the correct number.
Step 10: Function that will trigger when we press the check button
Here whenever the user presses the check button the count values for number of attempts will increase by one. Then we are storing the value entered by user in the variable called answer. Then we will check if the user hasn’t entered any value and pressed the check button the it will go to the reset() function and the application will close.
Now we have to convert the value entered by user to integer as we are going to compare it with the actual number.
Step 11: Close button that will trigger the reset() function
This function will set the want_to_play variable to False so that our application will close and will not start again. Then it will close the main window of our application.
Step 12: Main loop
We have to enter the main loop to run the program. If our program doesn’t have this line then it will not work. Our program will remain in the main loop until we press the close button.
Congrats! You’ve reached the end and built a successful Python Tkinter game. Great work applying your Python knowledge. I hope you enjoyed this article and learnt something new from it. If you landed here to find out how to build a game in Python, you’re gonna love the articles below. In this series on Tkinter we’ll be developing a total of Five games using Tkinter. So, hang tight!
Continue learning#
Frequently Asked Questions
How do you guess a number between 1 and 100 in Python?
How do you guess a number between 1 and 100 in Python?
How to make a number guessing game in Python?
How to make a number guessing game in Python?
Written By:
Pratik Shukla
Related Courses
Python Regular Expressions with Data Scraping ProjectsPython FTW: Under the HoodClean Code in PythonBuilding Robust Object-Oriented Python Applications and LibrariesSolving the Traveling Salesperson Problem in PythonUsing Python for Reading and Writing Optical LabelsIntroduction to Python for MATLAB UsersIntroduction to Data Science with PythonDesigning Graphical Causal Bayesian Networks in PythonPython Data Analysis and VisualizationPython for Mechanical and Aerospace EngineeringLearn Functional Programming in PythonFrom Python to NumpyManaging Contacts and Company Risk with Clearbit API in PythonBuild a REST API Using Python and Deploy it to Microsoft Azure
